Installation
Before beginning the installation and configuring of your new theme, you must first have WordPress already installed on a server.
If you are struggling, here is a very detailed guide at Wordpress Codex that will walk you through every step.
Installing The Theme
Once you have setup a copy of WordPress, there are two ways you can go about installing the theme:
FTP Upload
You will have a pckage names as Clubio_Package_x.x.zip

Unzip the downloaded package fully and you will have the theme as:
Theme Files\clubio.zip
Unpack it and upload all files from the clubio/ into your WordPress themes directory /wp-content/themes/.WordPress Automatic Installation
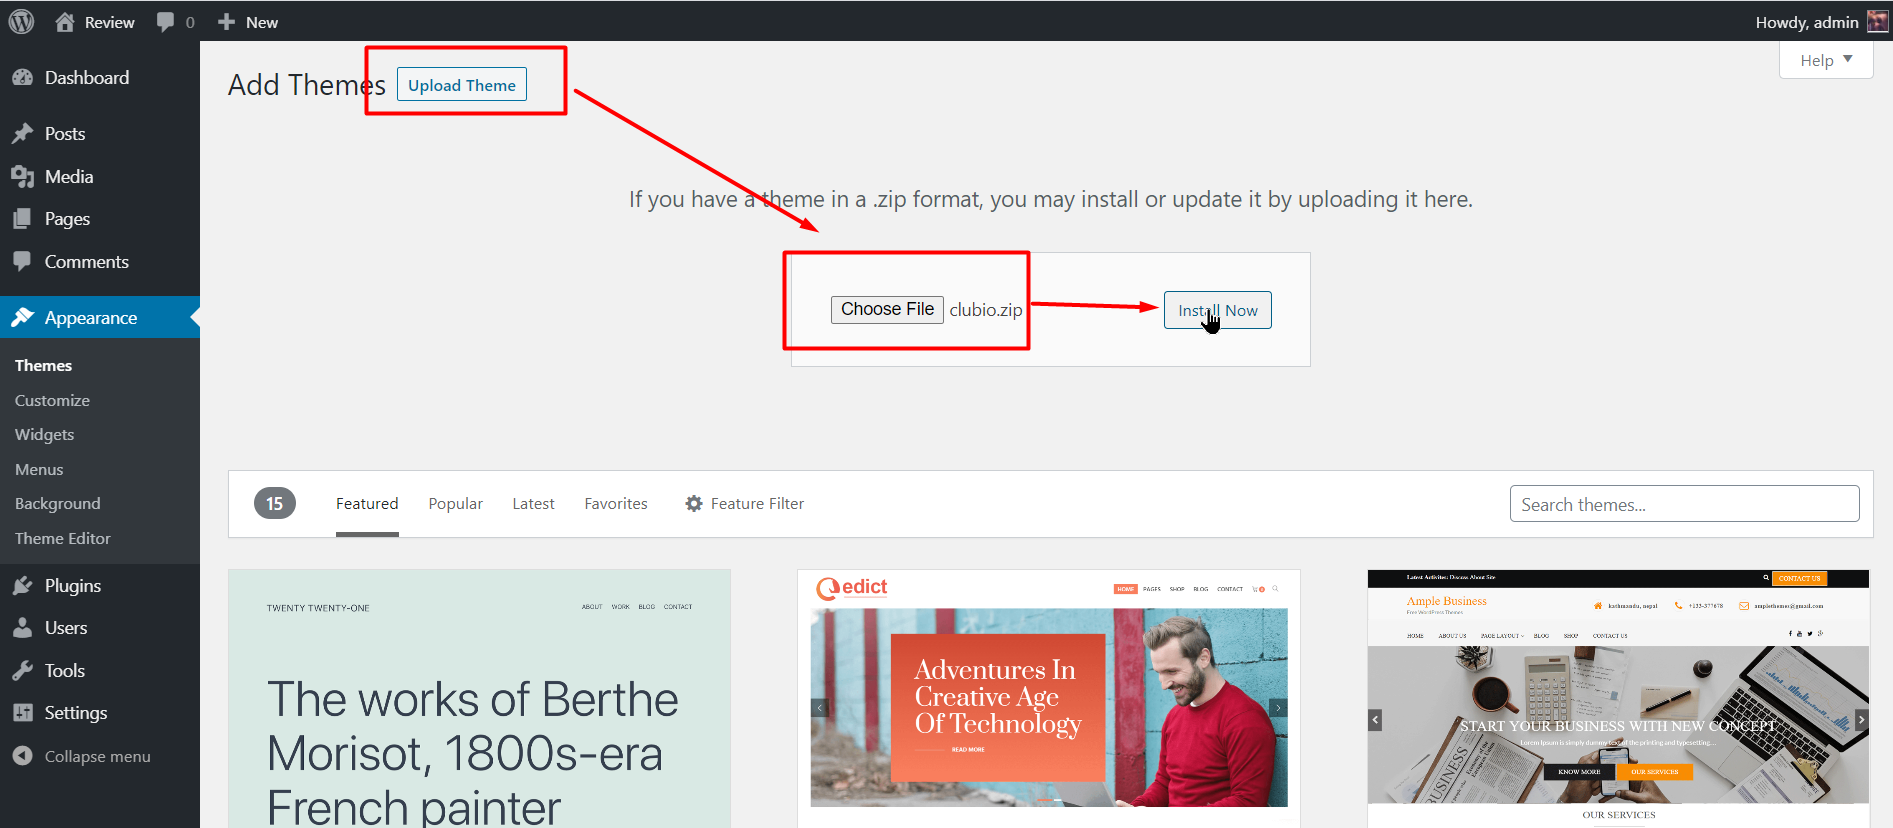
This is definitely the easier route for most. Simply navigate to Appearance > Themes > Add New > Upload Theme. Click the 'browse' button and locate the still zipped theme folder. The theme will be uploaded and installed in a matter of seconds.
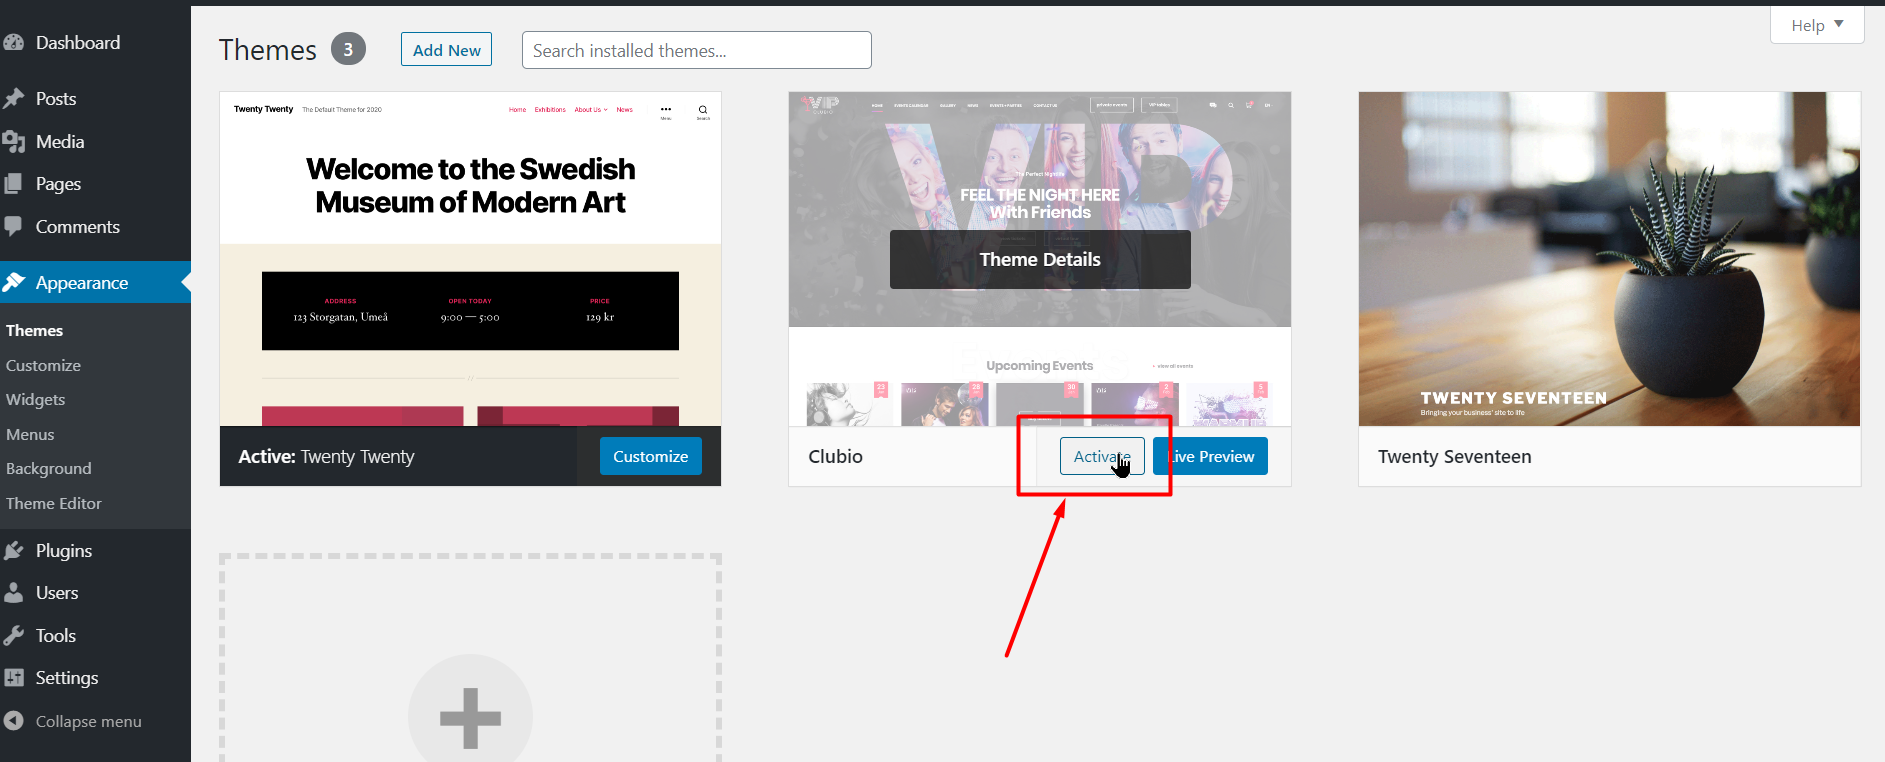
Then you need to activate installed theme.
Click Activate or go in admin left menu: Appearance -> Themes and activate Clubio
-
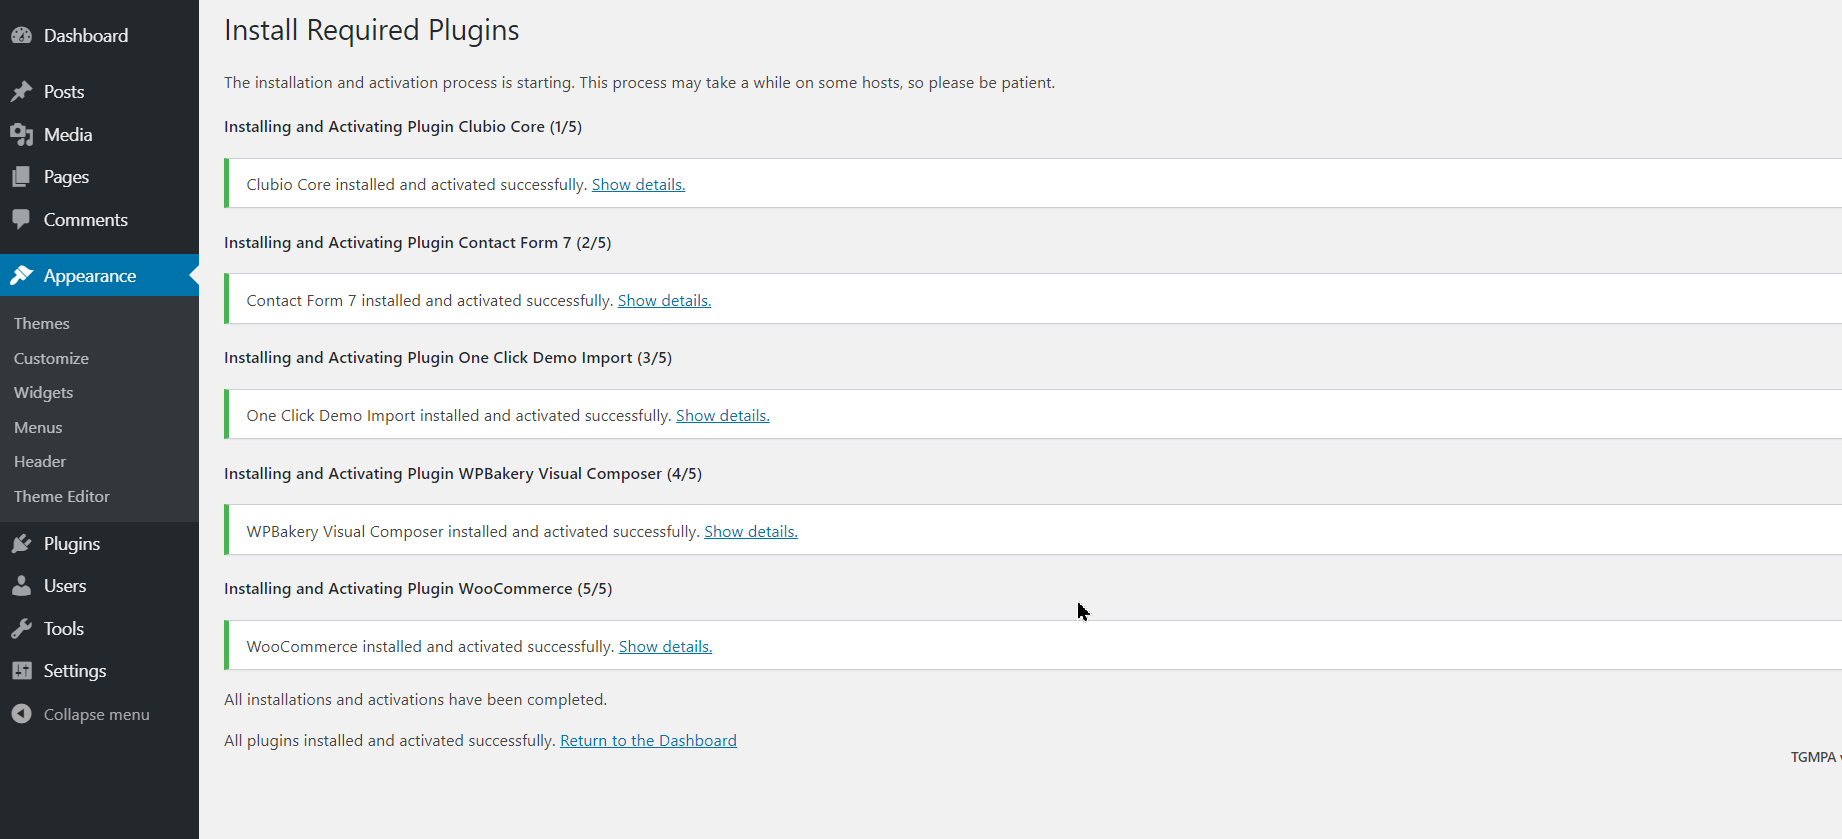
Plugins installation/activation
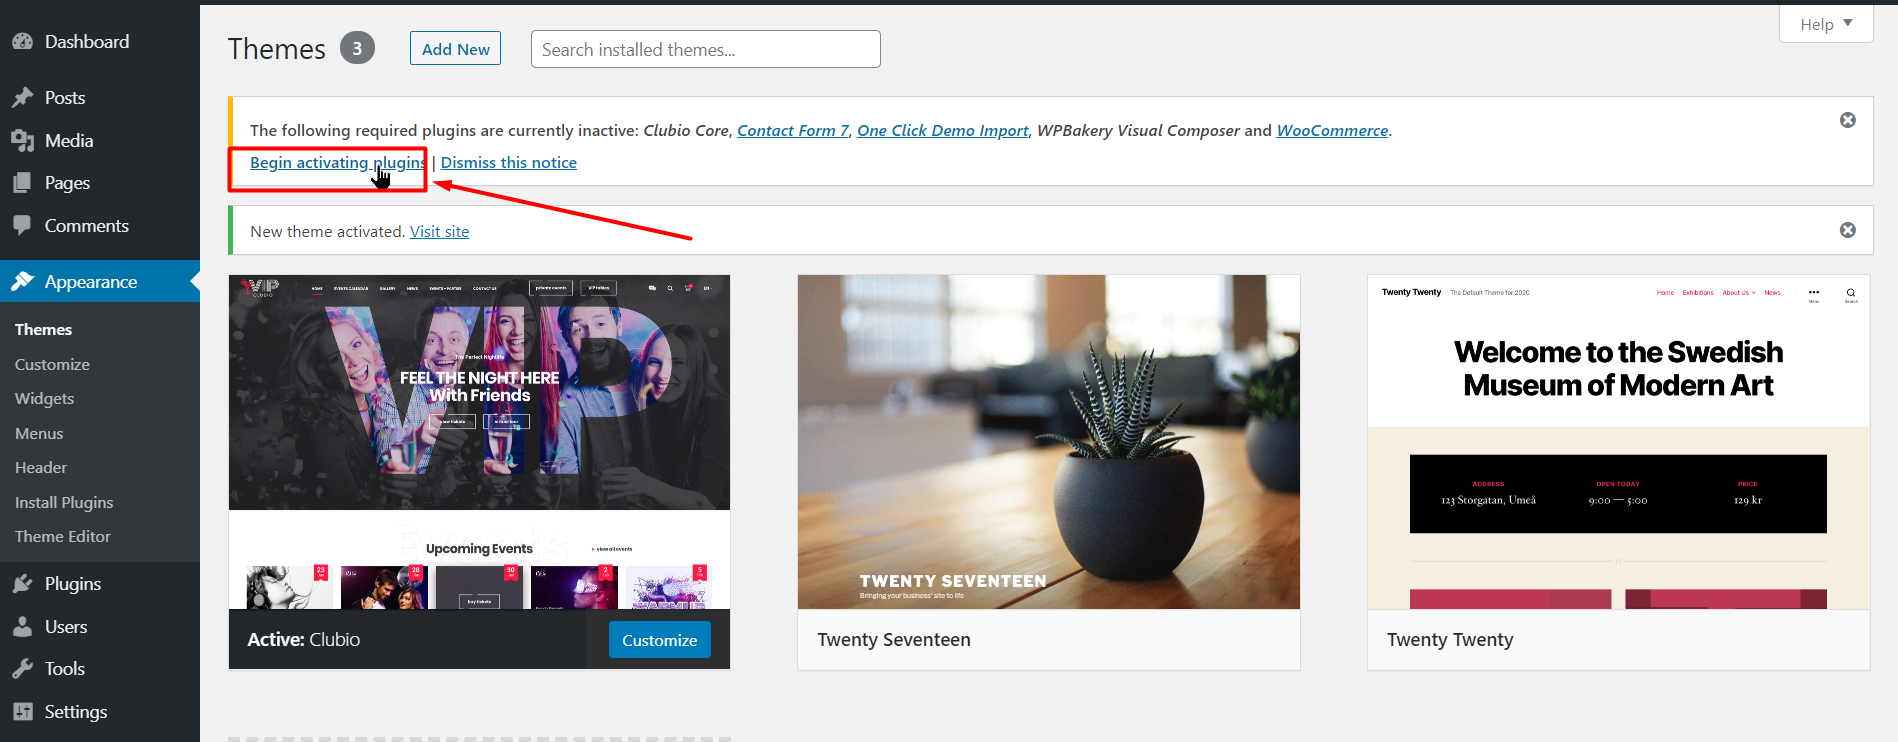
Once you have installed and activated our theme you will be promted to install theme's plugins. Activation of them will be done automatically.
-
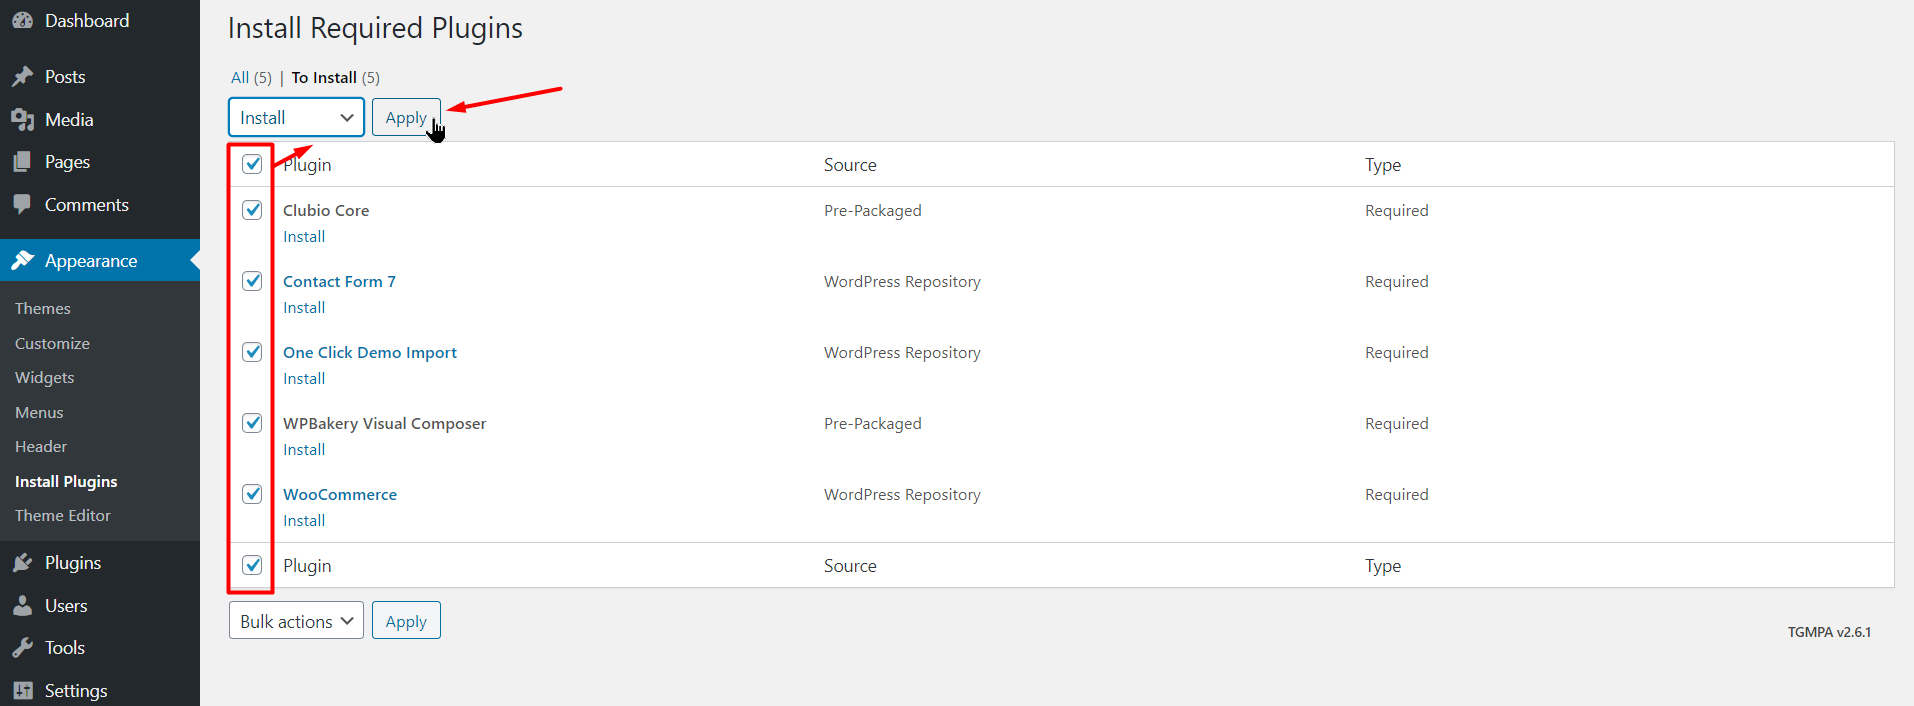
It is easy to choose all plugins via Bulk method and isntall all plugins together
-
Wait till all plugins are successfully be installed and activated
-
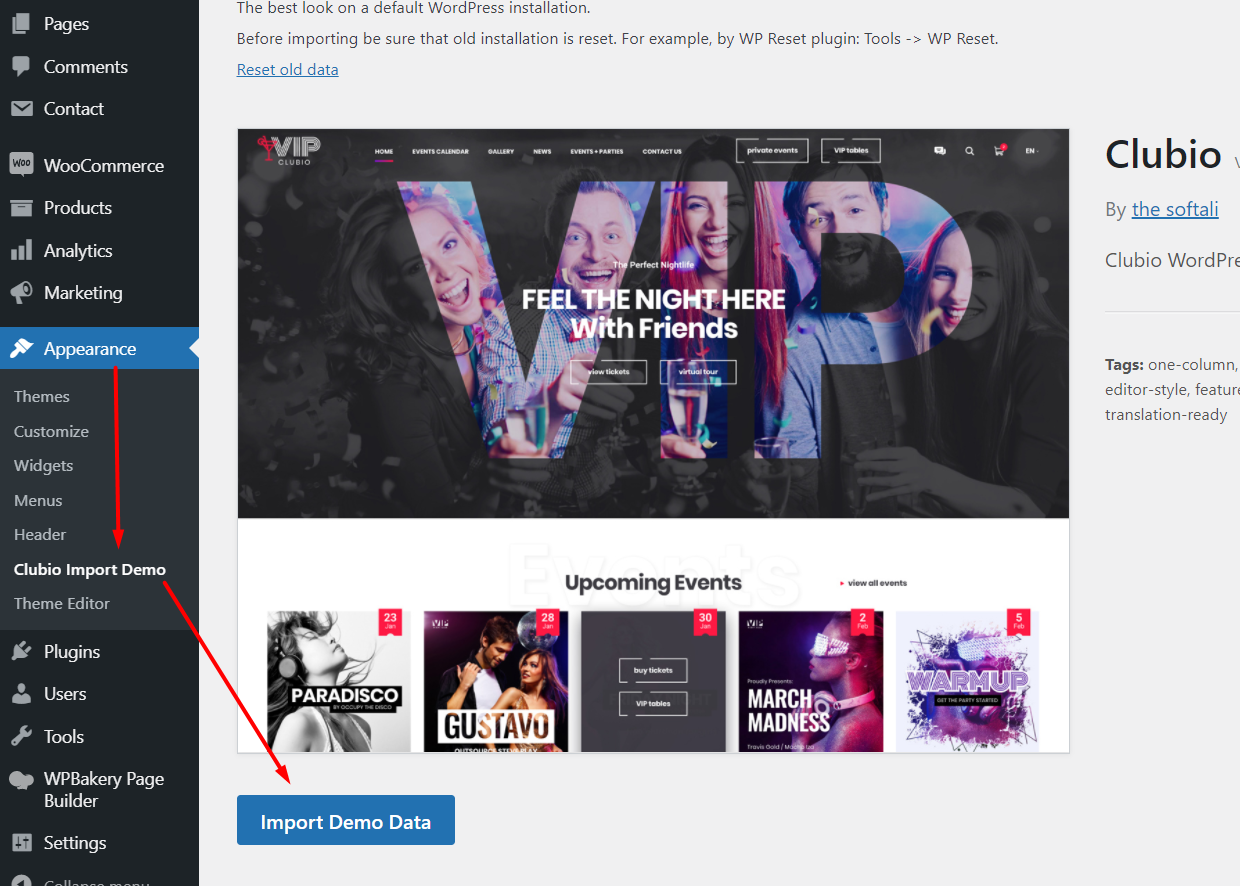
Import Demo Layout
Import layout. To import the exactly demo layout go in Appearance -> Clubio Import Demo.
Press the button Import Demo Data
-
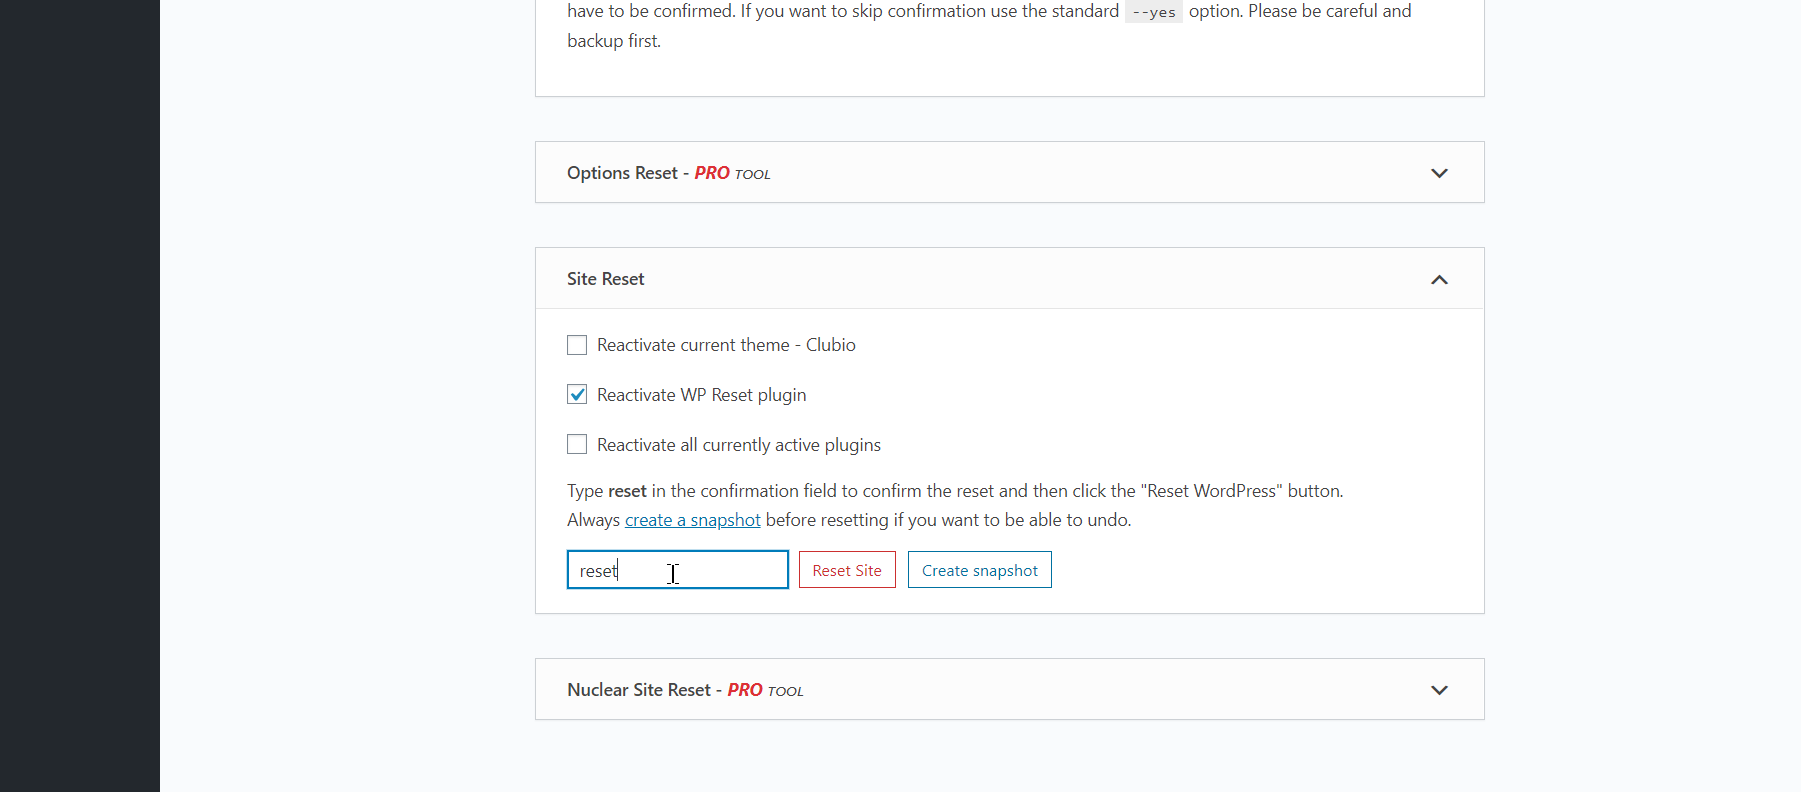
NOTE! If you need to have the original theme's layout reset all data by using WP Reset plugin. Go in Tools -> WP Reset
Activation
-
Please, keep in mind that one license of our theme can be used on one domain only.
If you need to move your license from one domain to another you should remove the license code from the old domain: remove the license in the Customizer, press the save button.
After this please write to us. We'll reset it. -
Don't activate any of caching plugins till your theme's version is activated!
-
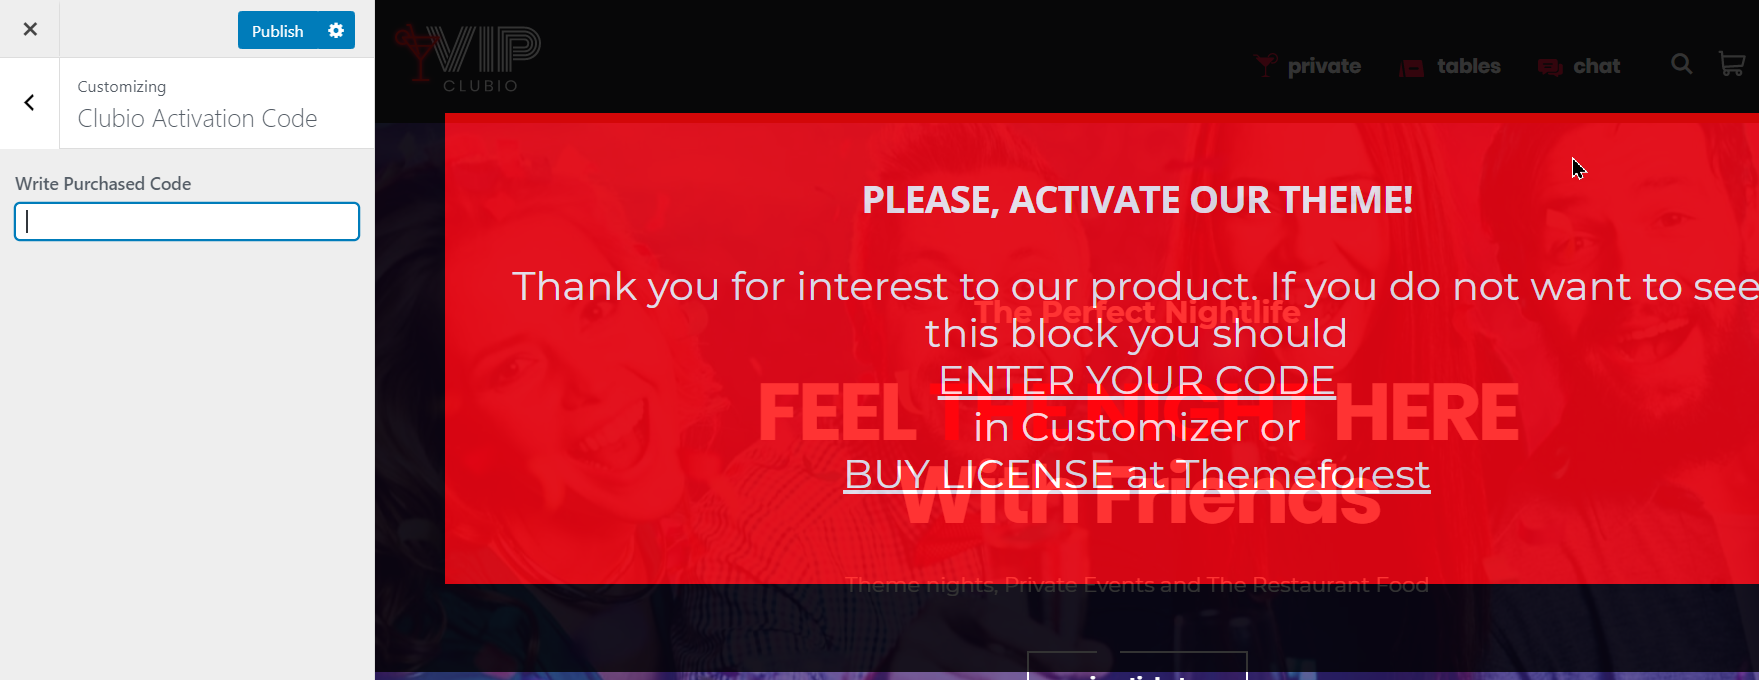
Activation process
Go in admin menu: Appearance -> Customize -> Clubio Activation Code
Enter your purchased code and press the Publish button
-
Activation problems
Please, keep attention if you see any problems with activation they can be caused by some reasons which are not connected with theme's files:
-
One license on two sites
You've entered your license code in one site or even on local hosting, for example, for development process. Then you're trying to enter the same code in the other site which will be your final site.
In such case you should remove the code from your development site, press the save button in the Customizer. Later you should write us on the forum to reset your code from the old site
-
Old theme's version
Please always check do you have the latest version of our theme.
During development process we make a review of theme's code, fix the issues and speed up activation process to ensure it on slow or non-optimised servers
After theme's update clean full browser cache or see your site in the incognito browser tab. Or check your site in an other computer/mobile device
-
Mess of domain names
Activation works for the current domain (domain name).
Pay attention if your site and admin panel have different addresses - this can cause problems with activation.

-
Using of caching plugins before license code entering
Firstly be sure that activation is done. Than activate a cache plugin.
-
Update
Backup all your themes files and database before any changes making
-
Upload all files from our theme's folder to the theme's folder on your server
This loading of files doesn't change your existing pages/posts/media files
This loading of files doesn't effect on Additional css which can be written on your site in Appearance -> Customize
-
If you haven't used Child theme and made changed directly in our theme's files you have to notice all of them.
After uploading of files from our latest version you will have to add your changes again
To detect and keep all your changes, compare them with a new code you can use any versions control software as GitHub or some svg systems.
So, you will check all actions in theme's package
-
The other step is to update the plugin Clubio Core
Don't reinstall it (don't make deactivation and activation of the plugin)
-
The latest version of the Clubio Core plugin is located in the theme's folder: \clubio\inc\libs\tgm-plugin-activation\plugins\theme-core.zip
Copy this package to your computer and unzip it
-
You will get the folder [theme-core] on your computer
Upload all files from the folder to the folder of the Clubio Core plugin on your server
This path is /wp-content/plugins/theme-core/
-
Update of WPBakery composer
Don't reinstall it (don't make deactivation and activation of the plugin)
Unfortunately, you're unable to update the plugin in the admin.The latest version of it you can always find in our theme’s package: Clubio_Package/Plugins/wpbakerybuilder.zip
Just unpack this package on your computer and upload all file by ftp from it on your site: /wp-content/plugins/js_composer/
Wait till all files from the plugin are uploaded. Don’t touch anything while it is uploading. -
Refresh a full browser cache by pressing twice Ctrl + F5
Or check your site in an incognito browser mode or in some new browser/mobile device
Translation
There are two plugins which can help you with fast translation of our theme. We've checked and used them on our demo.
The files with generated translation variables are placed in such paths:
- wp-content/themes/clubio/languages/clubio.pot
- wp-content/plugins/theme-core/languages/theme-core.pot
-
Polylang - This plugin is used to translate theme's pages, posts, widgets,some strings
-
Loco Translate - This plugin is useful to translate local constants which are located in the theme's folder: languages/clubio.pot file
You can use either this plugin or Poedit program. We recommends Loco Translate plugin because it allows to make translation and save them in admin interface. Without local opening of the file.
Poedit is a common program which you can use to translate the theme. It’s available for free on poedit.net. After you have installed Poedit, you can open it and select File > New Catalog from POT file. Then select the .pot file from the theme you wish to translate which you can find in the /languages/ folder of theme. Then go through every line of text and translate it to your native language. Afterwards you can save the catalog with your language code (for example es_ES.po). Normally Poedit automatically creates the .mo file and saves it, too. The last step you have to do is to upload your created language files to the language folder of your theme using FTP.
Translation of a page
For example, let's review the Homepage translation
Firstly, you open a current homepage and press on the + button
![]()
Then copy the same content from the English version to your language version.
![]()
Pay attention to the page options:
Page Format Options -> Not display title from admin field "Title"
Page Attributes -> Template -> Clubio Template
Finally, you should see that page are linked to each other:
![]()