Theme Structure
Header
-
Logo, Favicon
go in admin left menu: Appearance -> Customise -> Site Edentity -> Logo / Site Icon

-
Top Menu
Go in admin left menu: Appearance -> Menus -> choose Clubio Header Menu (Clubio Header Menu) and edit it following the standard WordPress procedure.
-
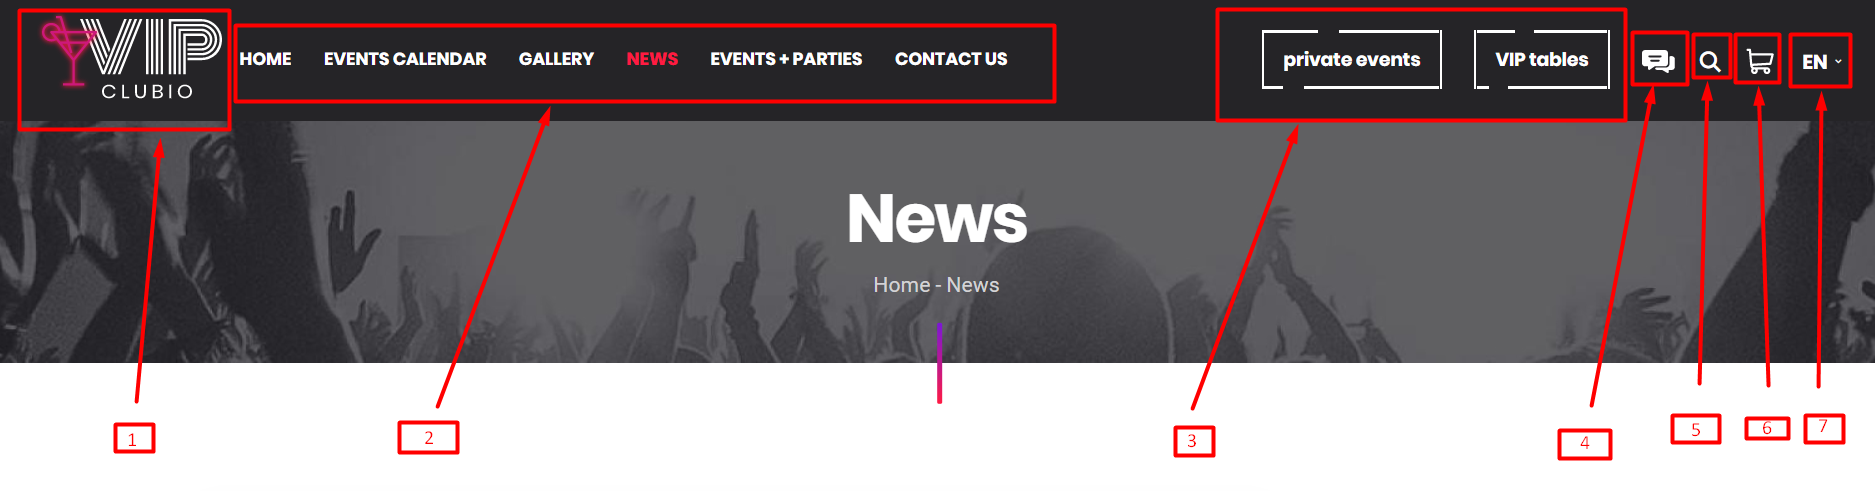
Header Information Buttons
Go in admin left menu: Appearance -> Widgets -> Theme Header Info Buttons, add/remove the code or edit code partly:
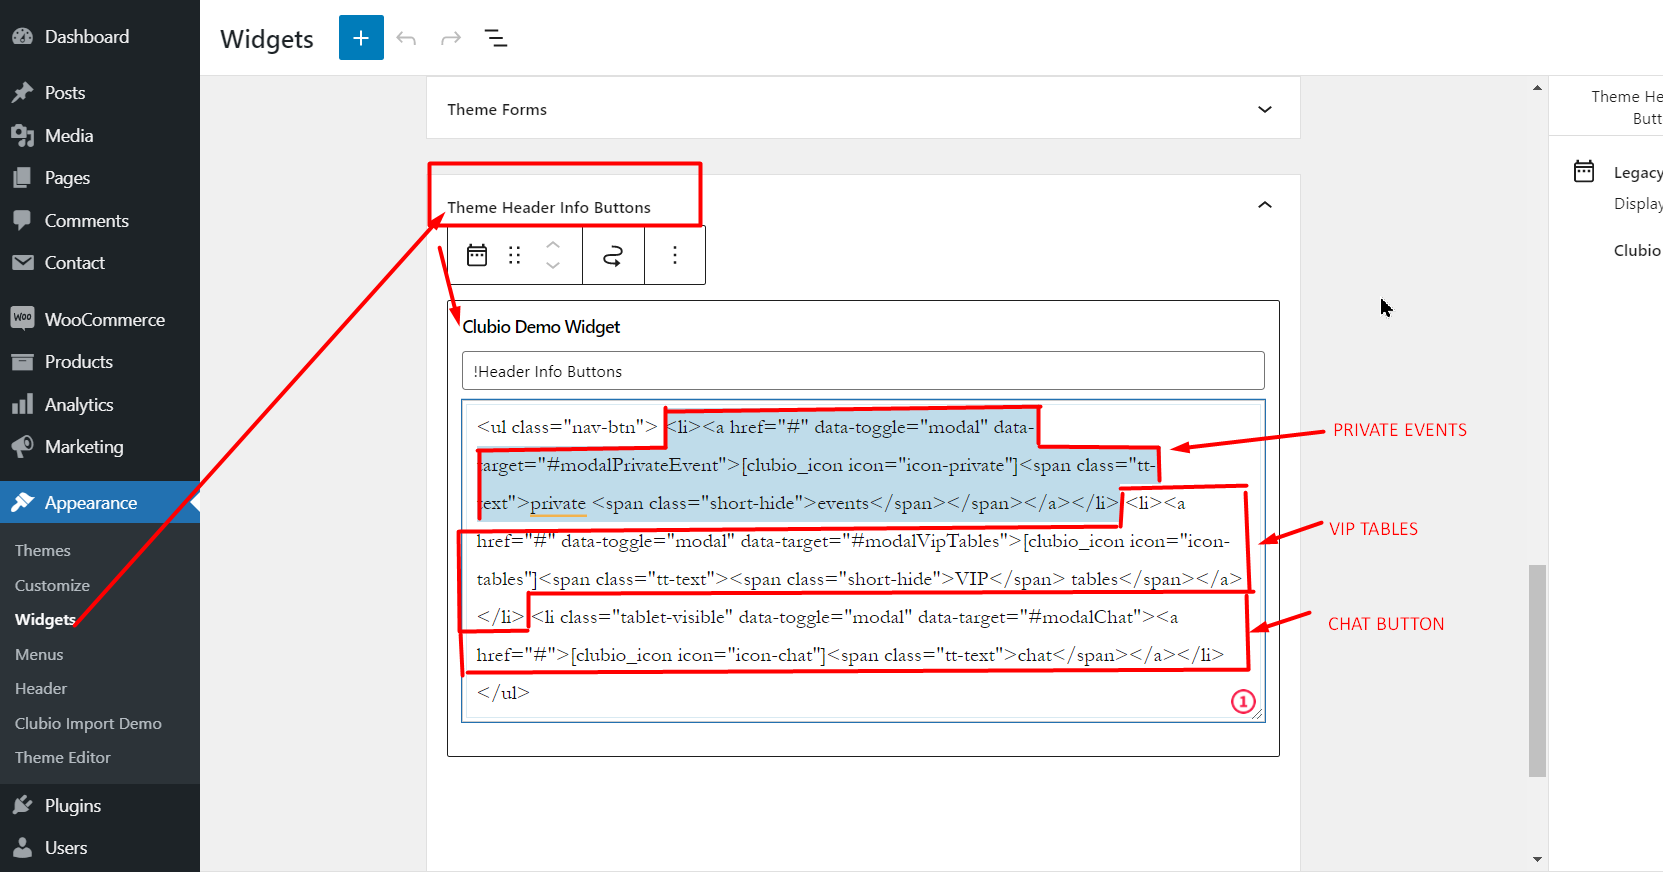
The original demo code:
-
Header Chat Button
Go in admin left menu: Appearance -> Widgets -> Theme Header Right Buttons, add/remove the code:
-
Header Top Search
Go in admin left menu: Appearance -> Widgets -> Theme Header Right Buttons, add/remove shotrcode:
[theme_search_header] -
Header Top Cart
Go in admin left menu: Appearance -> Widgets -> Theme Header Right Buttons, add/remove shotrcode:
[clubio_mini_cart] -
Languages button
We recommend to use the plugin Polylang
Our language button is composed to be compatible with this plugin.
Go in admin left menu: Appearance -> Widgets -> Theme Header Right Buttons, add/remove shotrcode:
[theme_languages_button_pl]The language button will appears when at least one page is translated to other language. And both pages are linked together.
Please keep attention! If you want to use another language plugin you will have to arrange it manually.
Footer
-
Footer Menu
Arrange menu in admin left menu: Appearance -> Menus -> Theme Footer Menu
Choose corresponding menu and add/edit items -
Footer Logo
Go in admin left menu: Appearance -> Widgets -> Theme Footer Left Logos
By default svg icon logo is set. You can remove full the code and insert own svg code for logo or remove existing widget and add Image widget with own logo.
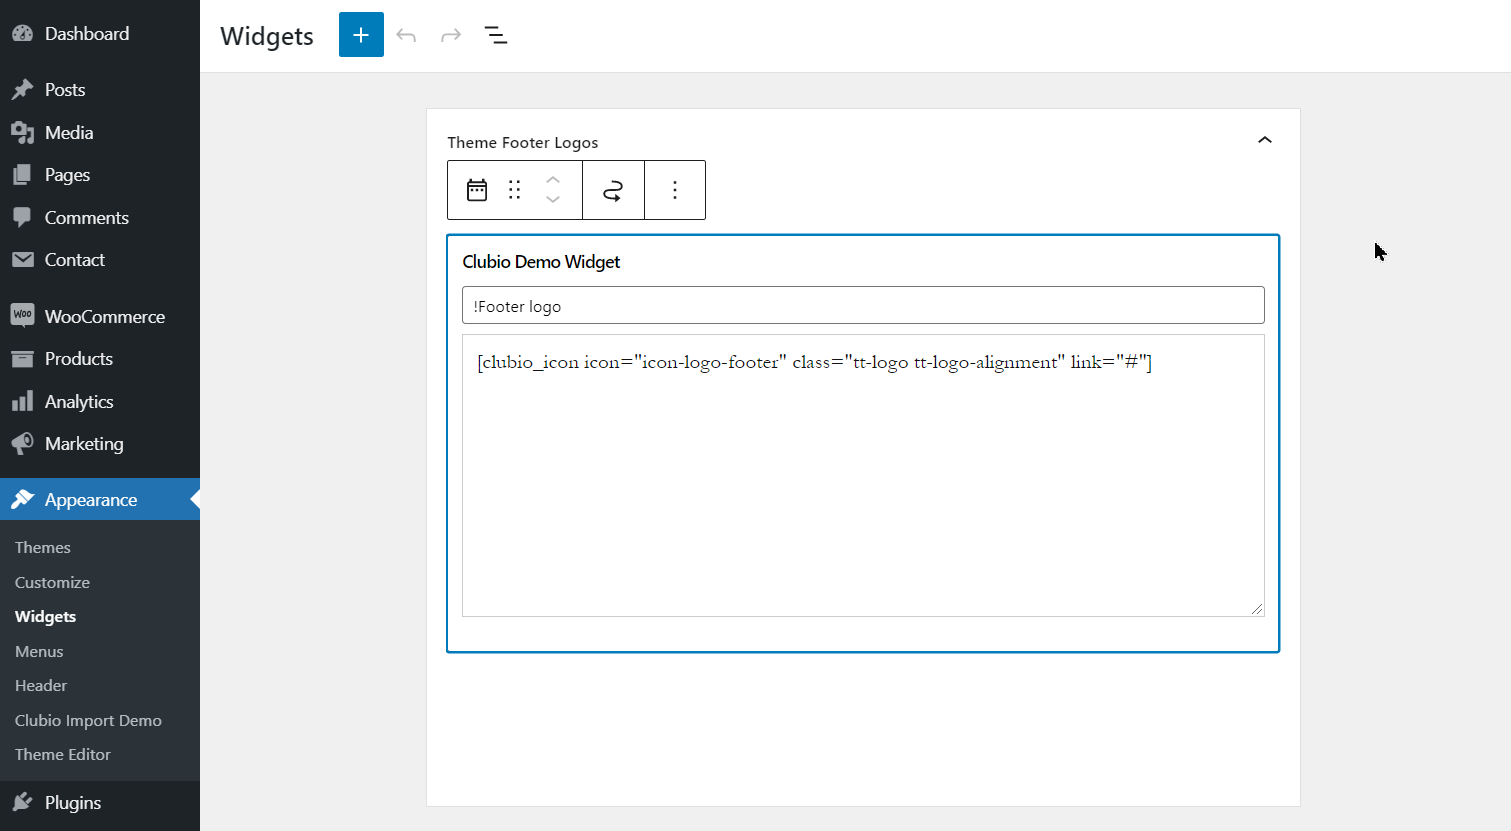
In our original demo the SVG code is added:
[clubio_icon icon="icon-logo-footer" class="tt-logo tt-logo-alignment" link="#"]
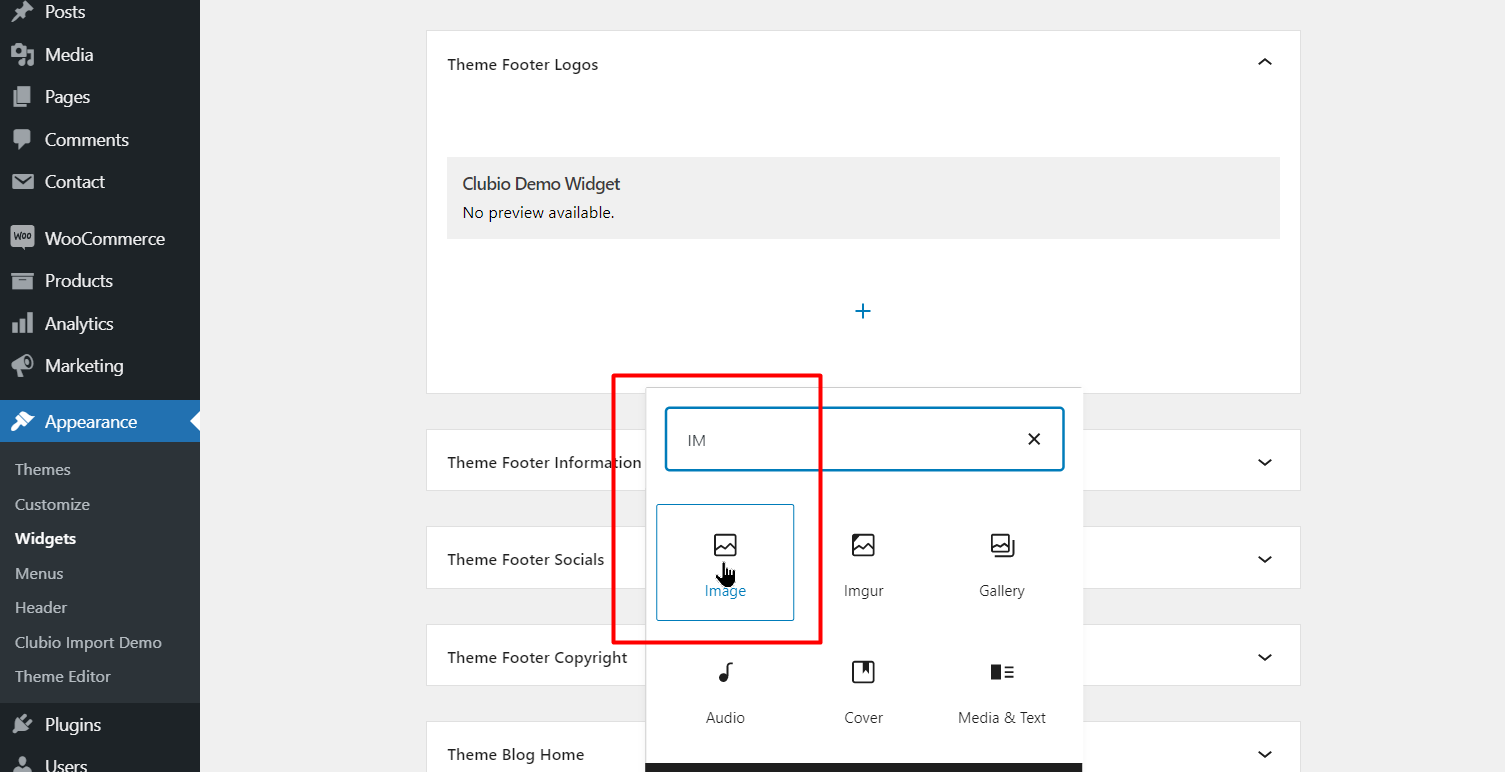
But if you need to add just an image in the Footer add the widget Image here
-
Footer Information
Go in admin left menu: Appearance -> Widgets -> Theme Footer Information
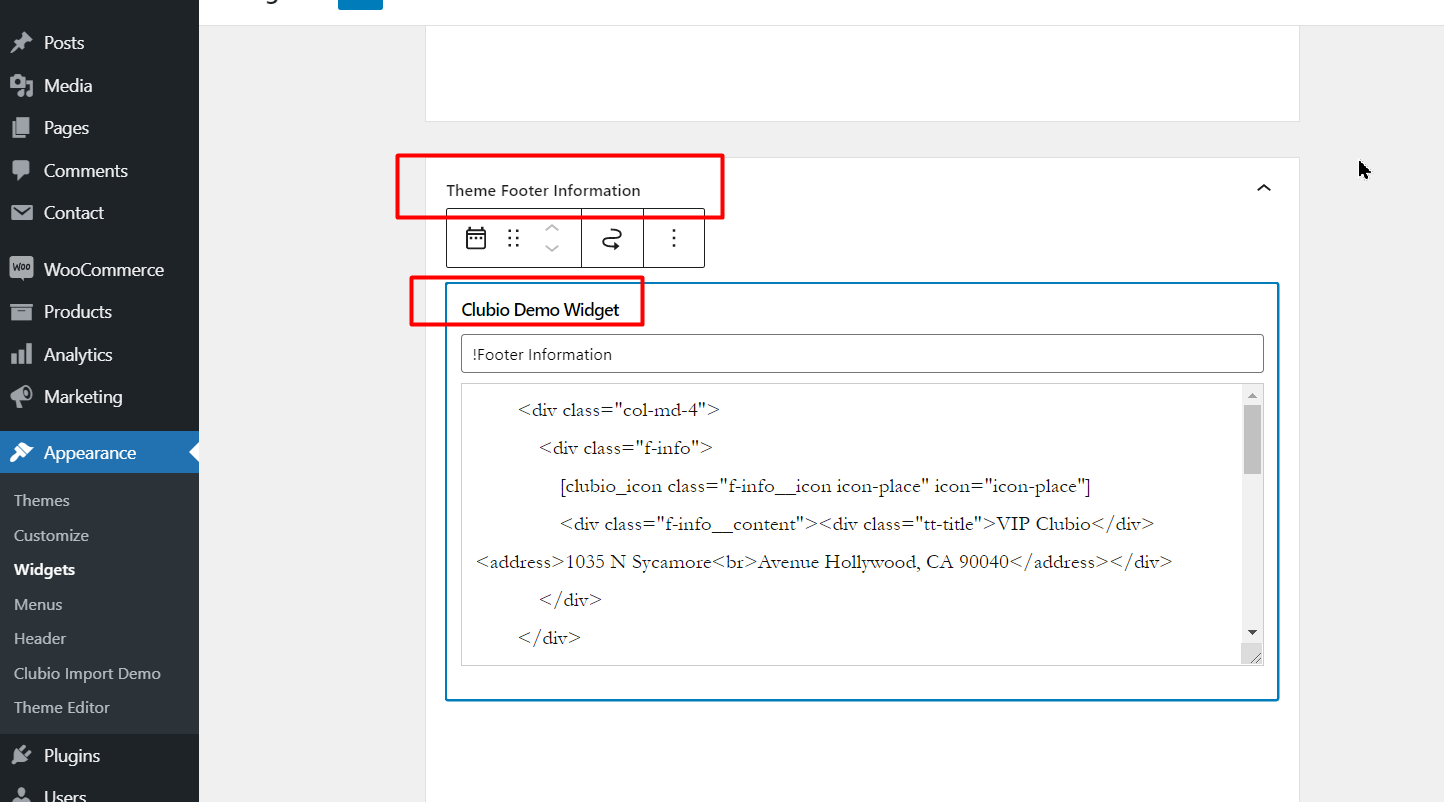
Default html content from the demo:
-
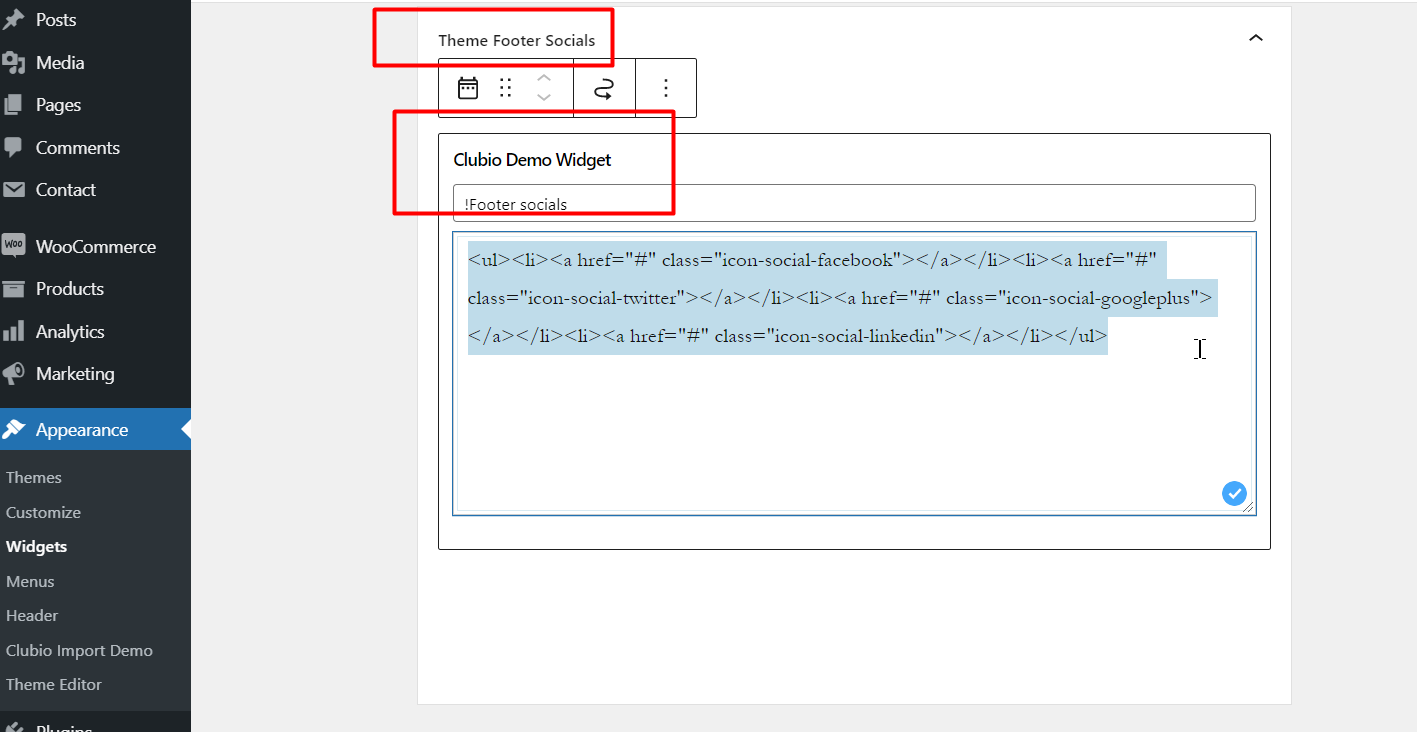
Footer Socials
Go in admin left menu: Appearance -> Widgets -> Theme Footer Socials
-
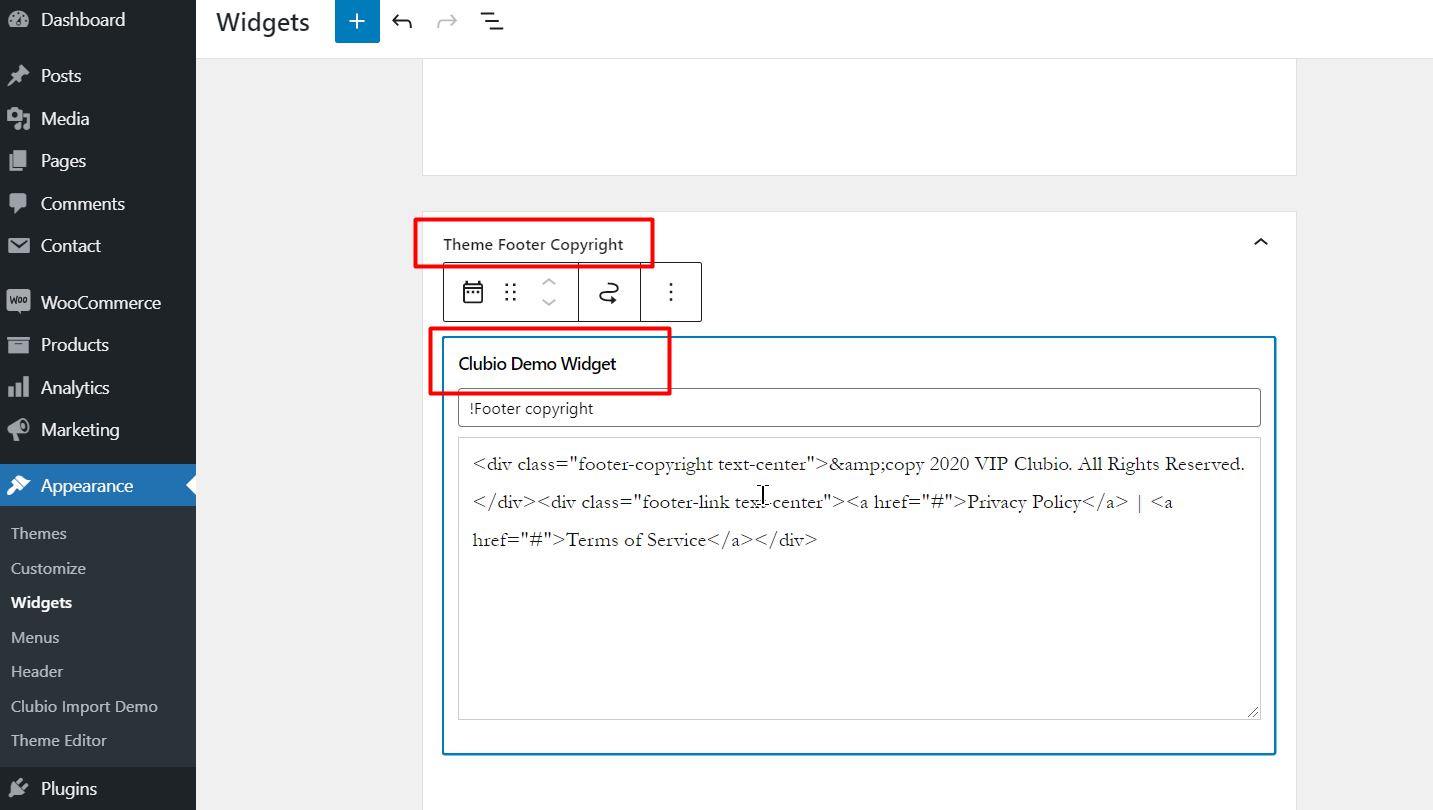
Footer Copyright
Go in admin left menu: Appearance -> Widgets -> Theme Footer Copyright
Homepage
Go in Pages -> Clubio Home Page
If you want to create the page manually from scratch you can use our original demo blocks to compose a Homepage
Modal blocks
Button content which are linked with Modal blocks should be added in Widgets -> Theme Header Info Buttons
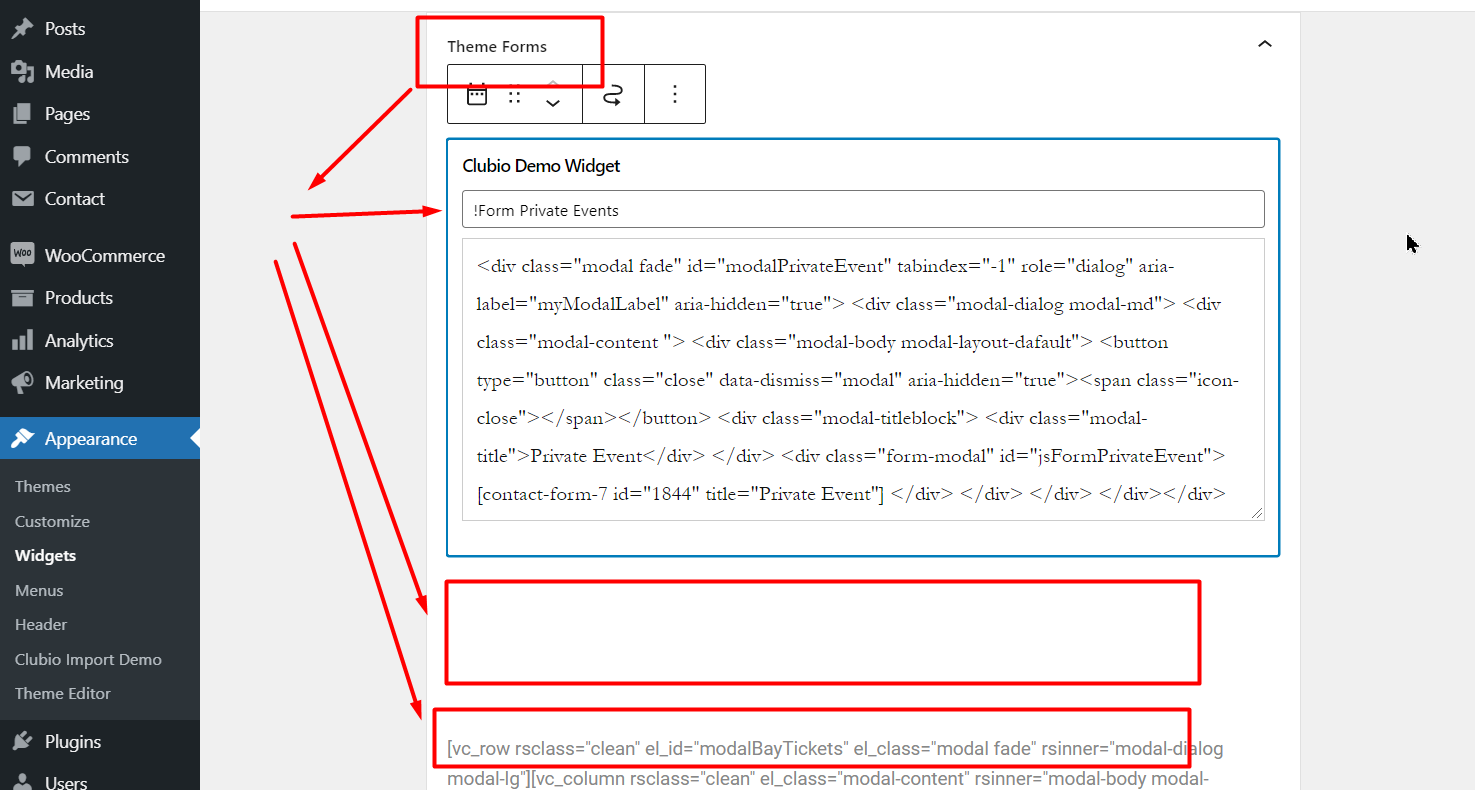
To add new blocks or change the existing on go in Appearance -> Widgets -> Theme forms
-
Please, pay attention that each modal block should be placed separately.
You should add a new widget called Clubio Demo Widget to each modal block. -
Don’t place the block inside of other block.
-
Each modal block should have outer id.
-
The buttons in the header right part widget Theme Header Info Banners are connected with modal blocks via the attribute:
data-targetEach modal block has outer attribute id
-
For example, if you try to connect the button VIP tables it has the html:
<a data-target="#modalVipTables" ... > ... VIP tables ... </a>So, the modal block should have html with id attribute:
<div id="modalVipTables" ... > ... </div> -
For the button private events it has the html:
<a data-target="#modalPrivateEvent" ... > ... private events ... </a>So, the modal block should have html with id attribute:
<div id="modalPrivateEvent" ... > ... </div> -
For example, if you try to connect the button modal chart it has the html:
<a data-target="#modalChat" ... > ... .. </a>So, the modal block should have html with id attribute:
<div id="#modalChat" ... > ... </div>
-
Modal Form Private Events
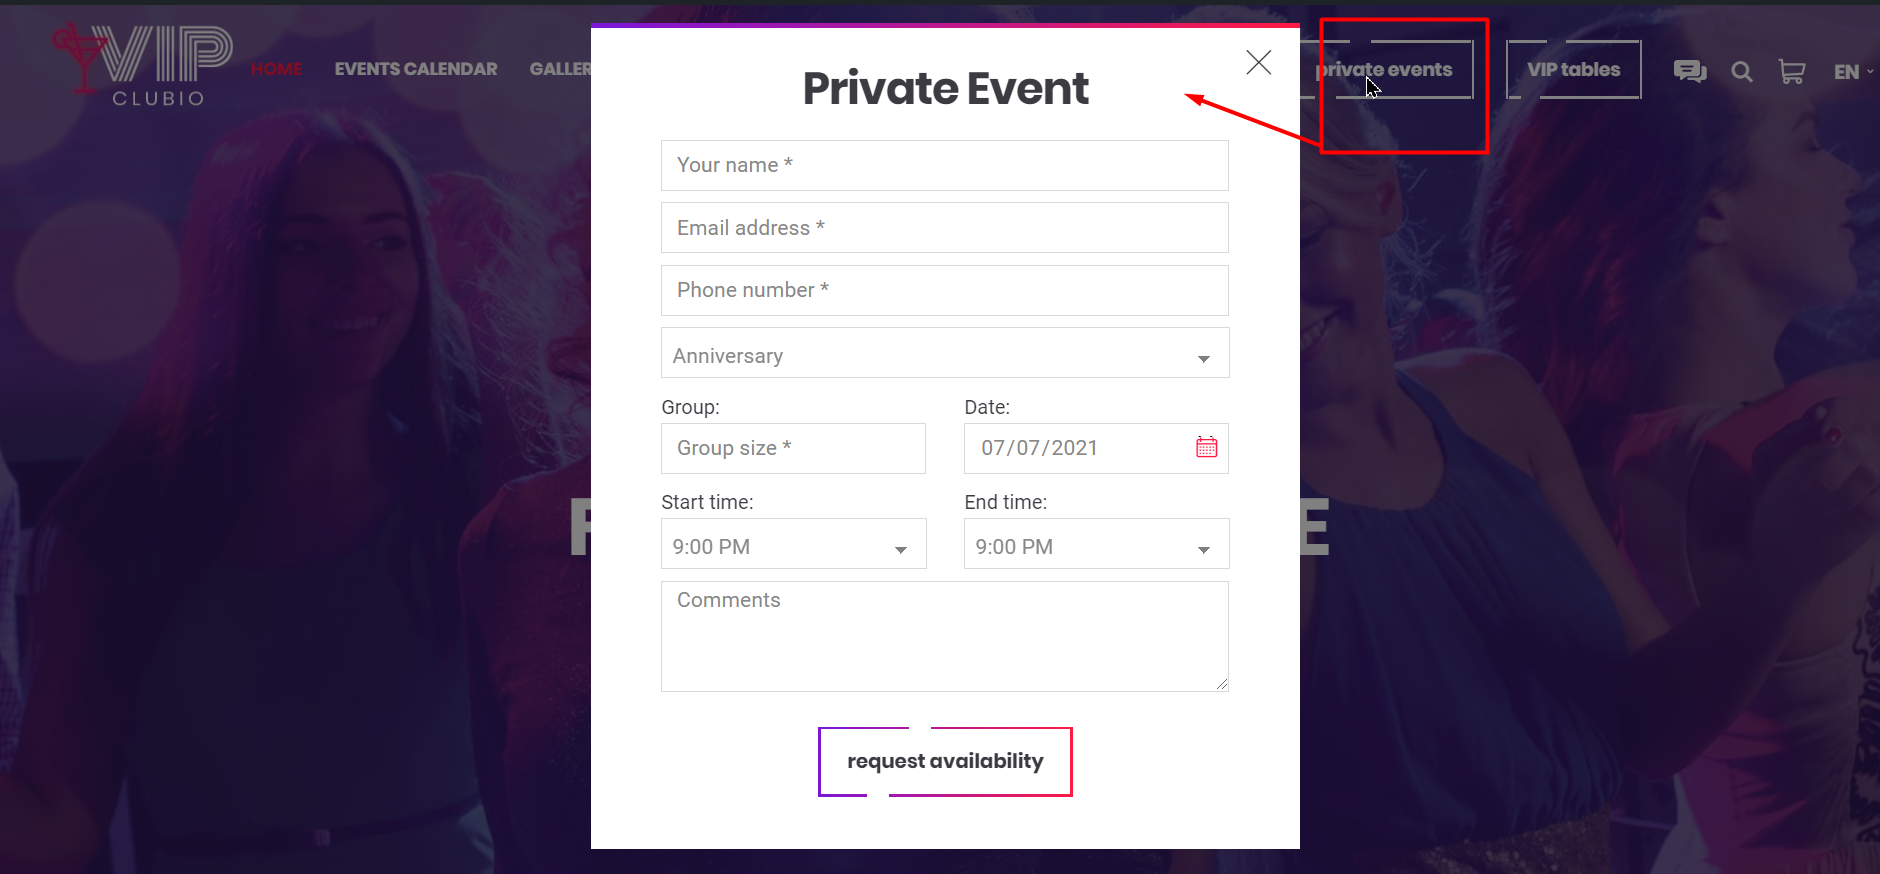
Original demo code for the block:
-
Modal Form VIP Tables
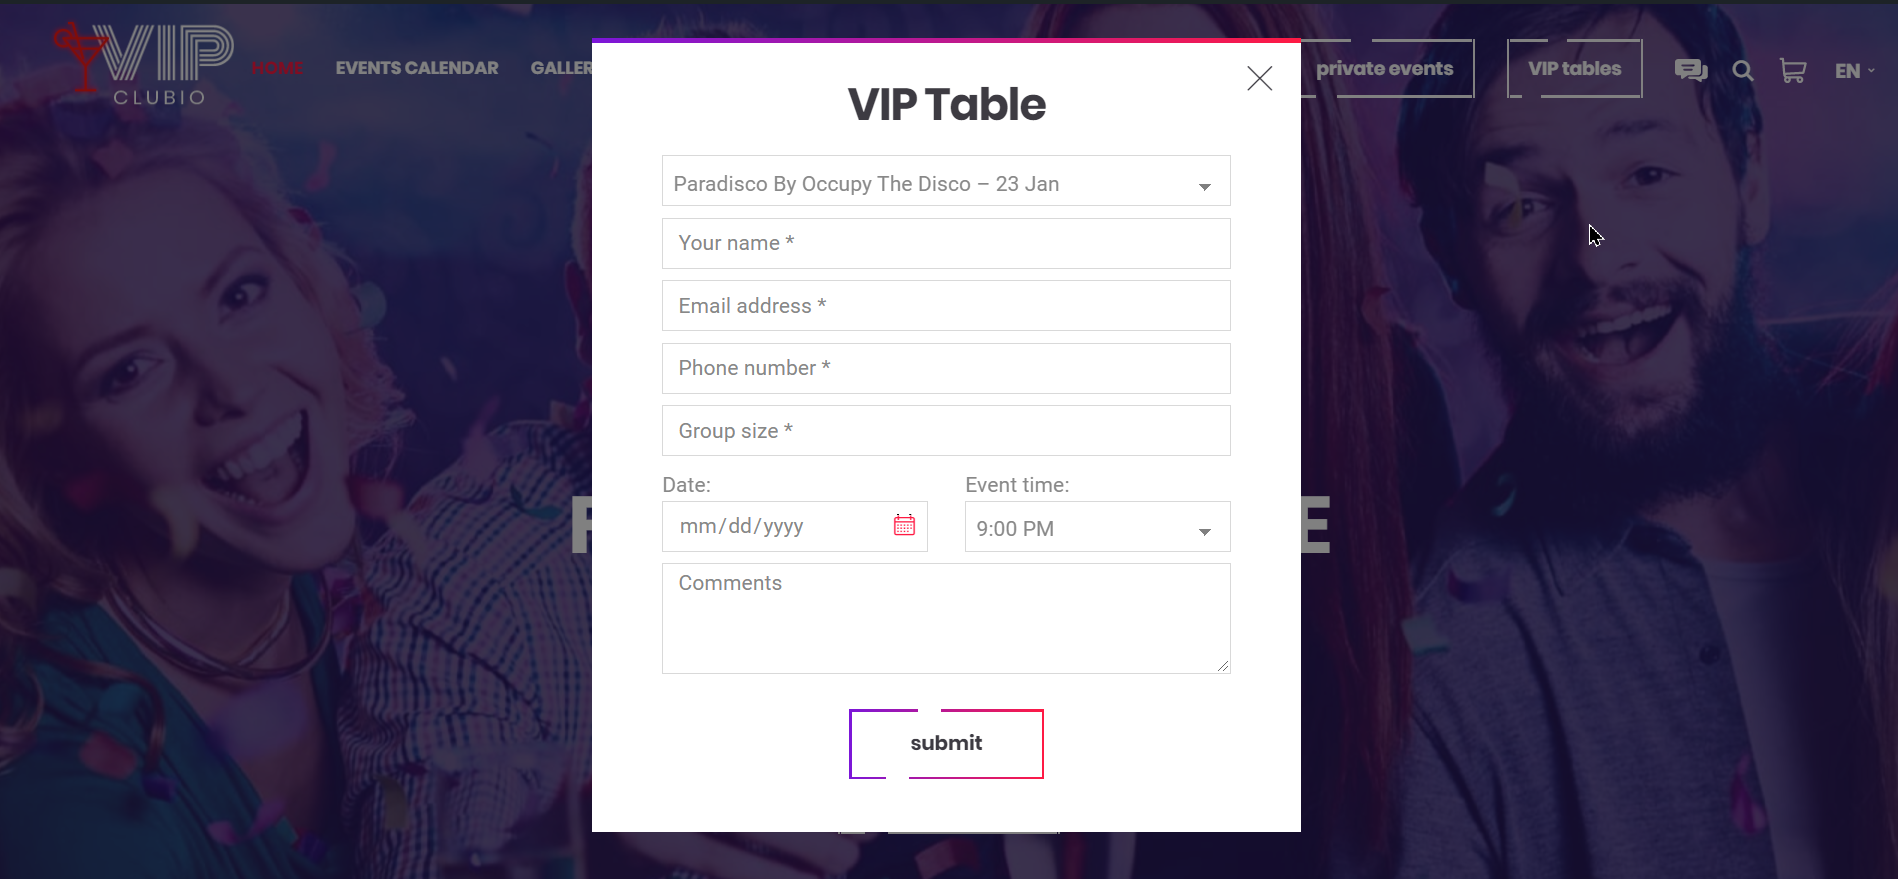
Original demo code for the block:
-
Modal Form Modal Chat
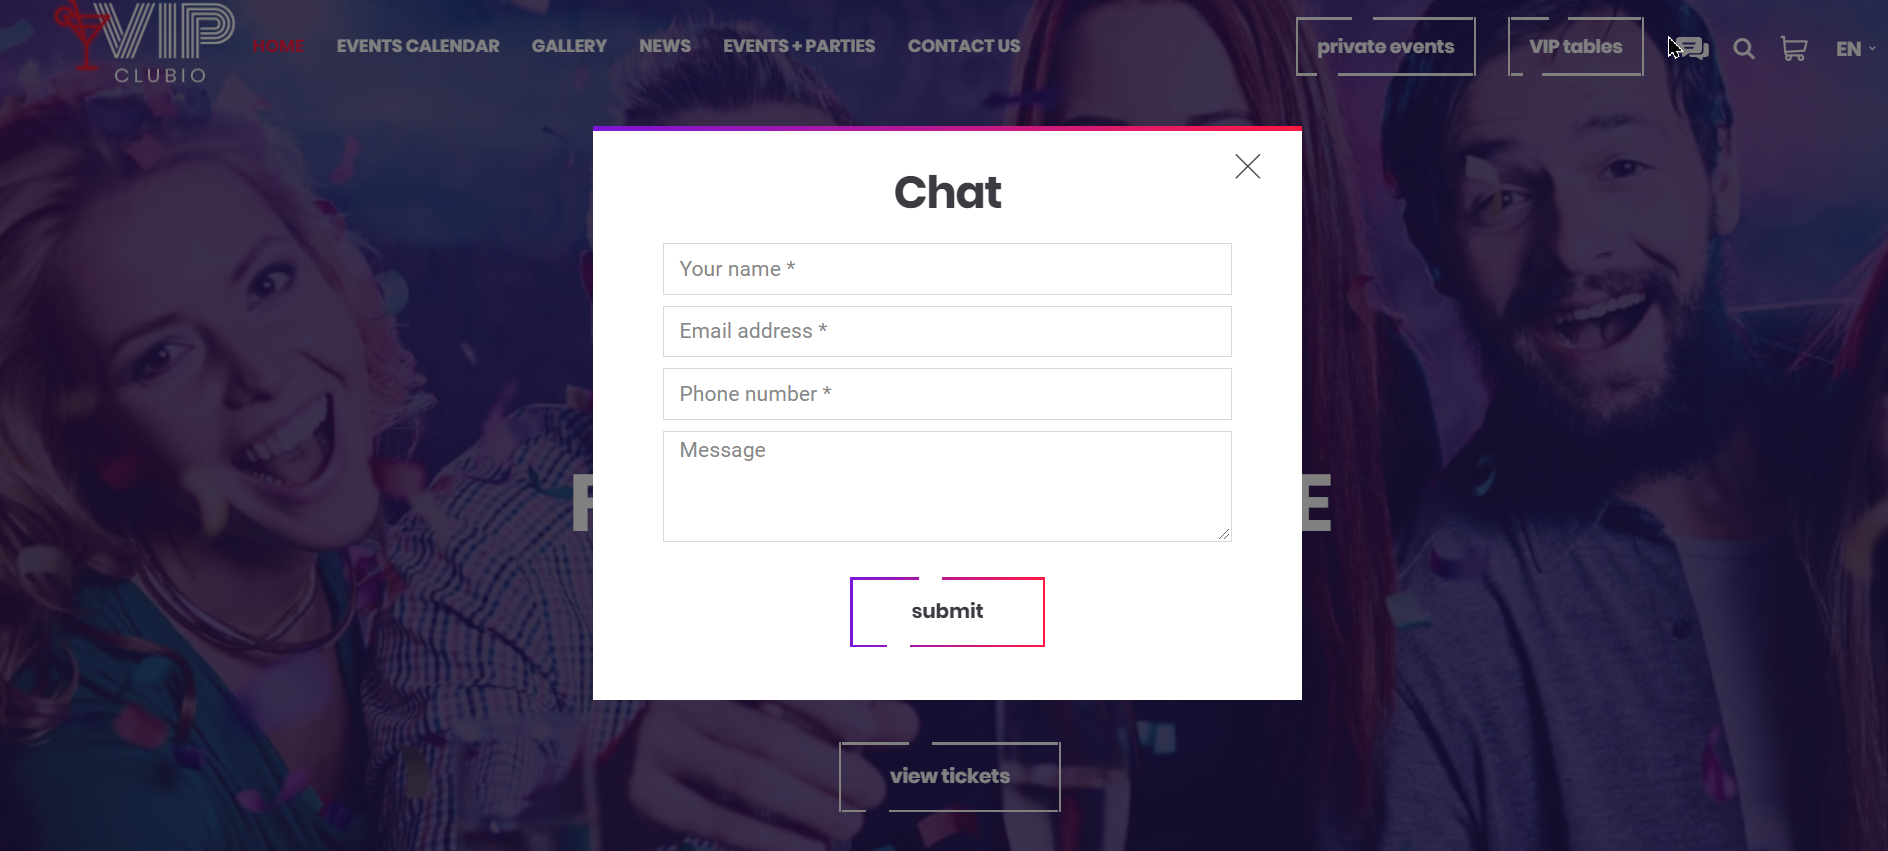
Original demo code for the block:
-
Modal Form Buy Ticket
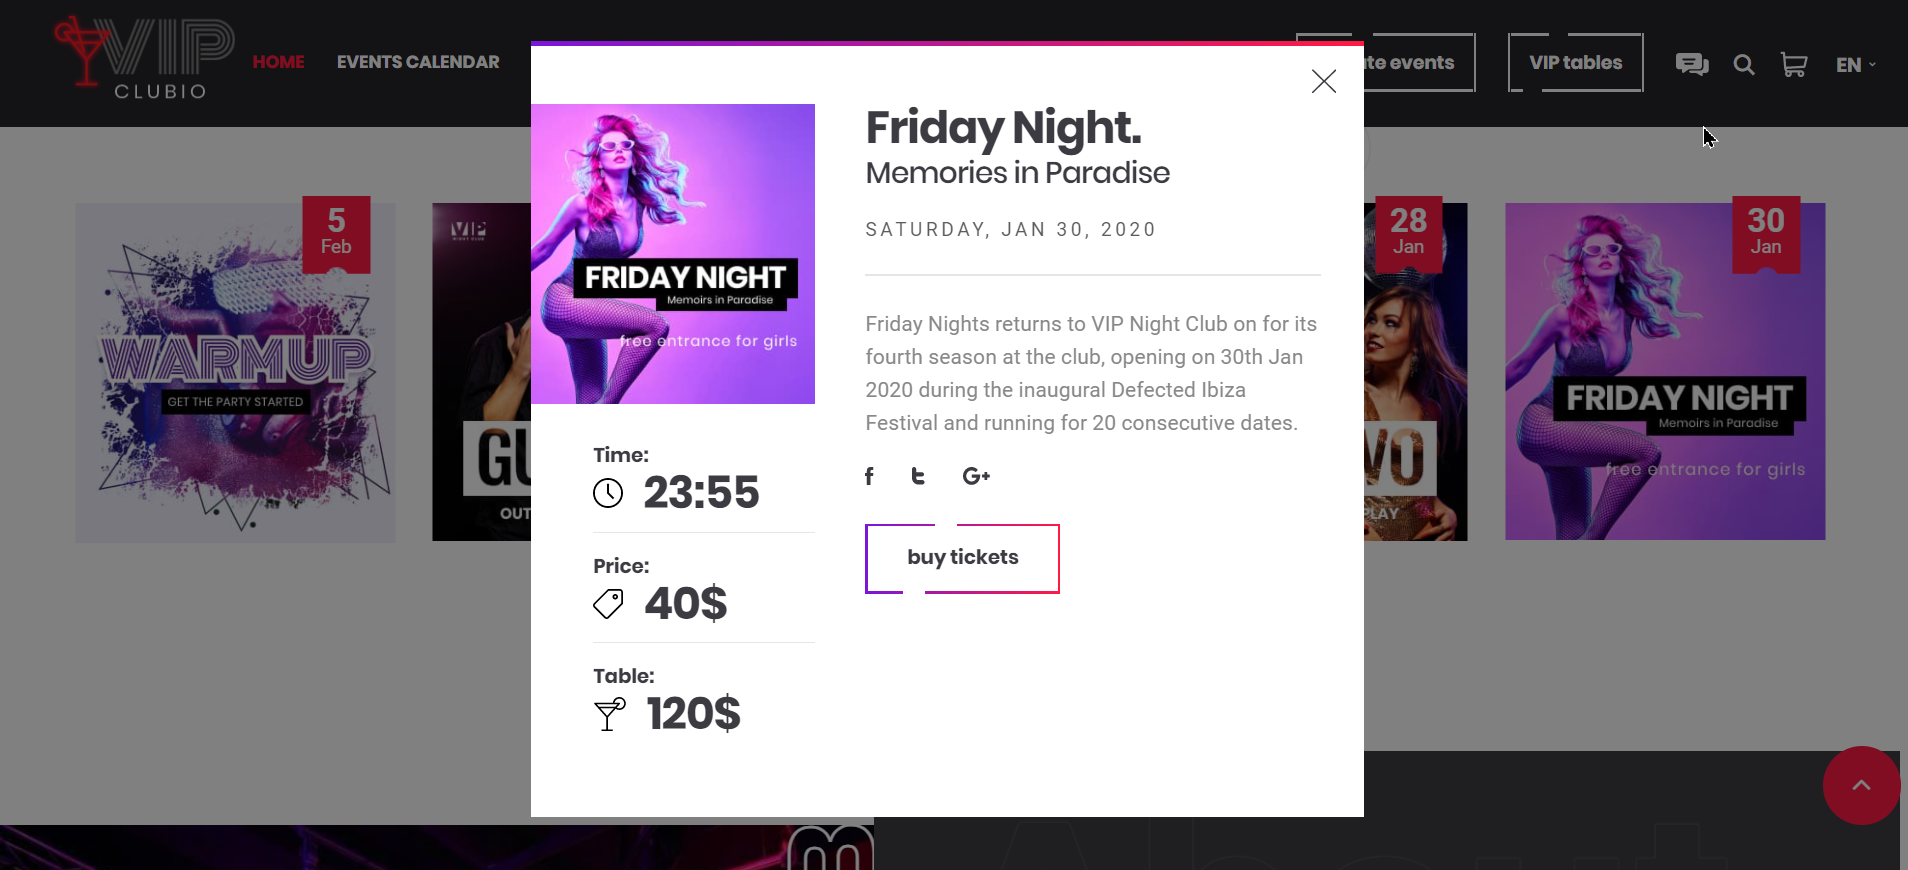
Original demo code for the block:
Options: Colors/Fonts
-
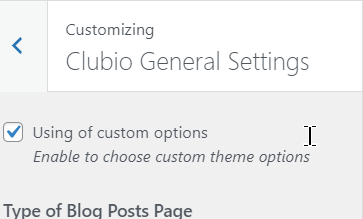
Activate using of custom options
Go in Appearance -> Customize -> Clubio General Settings -> Use of custom options
-
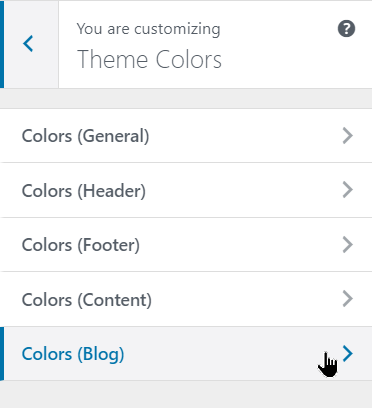
COLORS
Go in Appearance -> Customize -> Theme colors, change them if you need and press Publish button
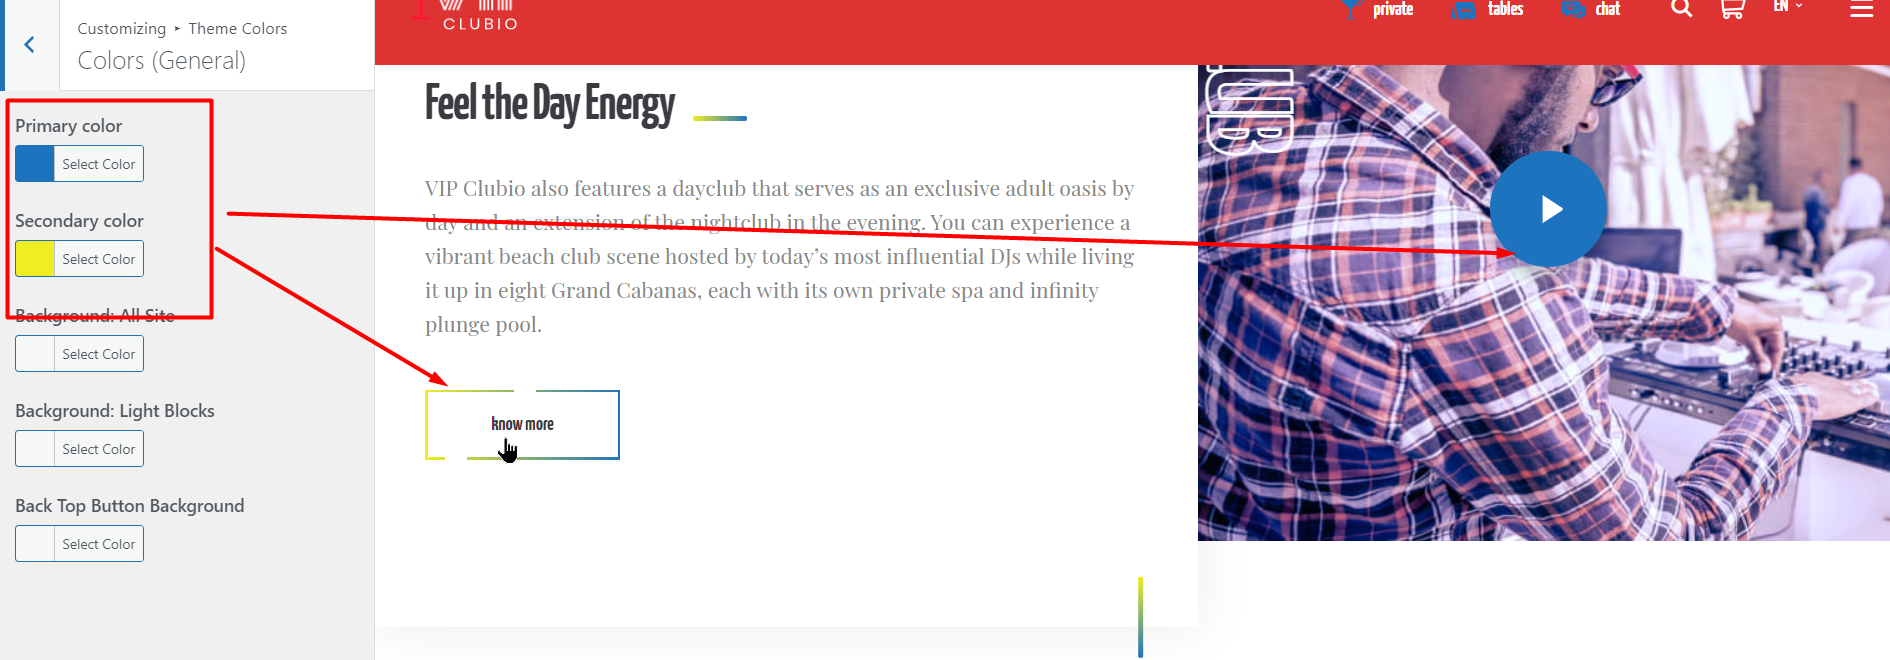
Main colors of the theme
For example, to change the main theme colors (which are pink and purple by default):
Go in Appearance -> Customize -> Theme colors -> Colors (General)
Use fields:
- Primary color
- Secondary color
-
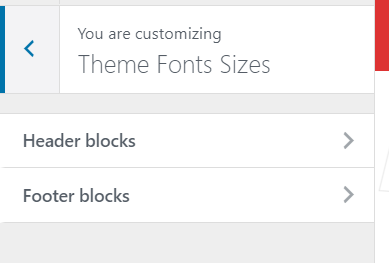
FONTS SIZES
Go in Appearance -> Customize -> Theme Fonts Sizes, change them if you need and press Publish button
-
GOOGLE FONTS
Go in Appearance -> Customize -> Theme Google Fonts, change them if you need and press Publish button
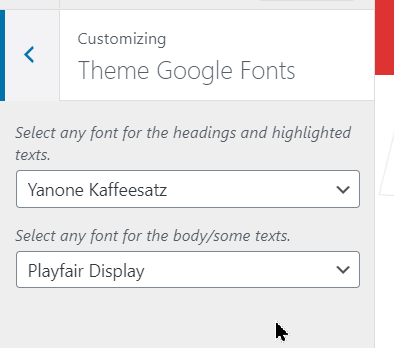
If you need to change only one font you may left the other one as "-" symbol
Options: Preloader
-
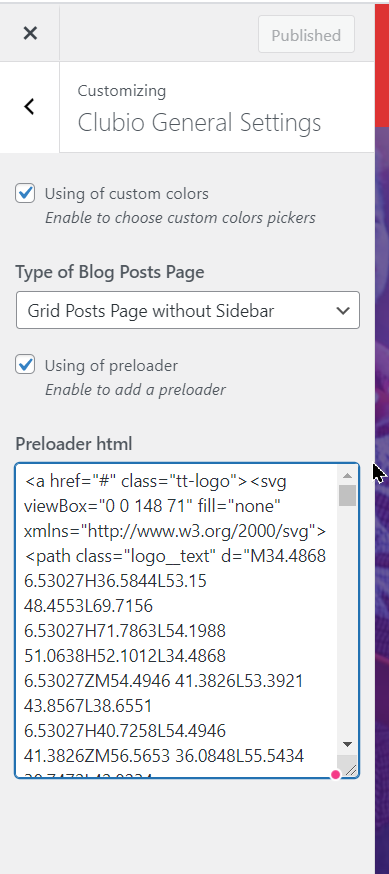
To activate a preloader go in Appearance -> Customize -> Clubio General Settings -> Using of preloader
-
In the field Preloader html enter own html to be used in the Preloader in the Main Slider or use the theme's premade html
-
Some examples of html:
-
Original demo code for the SVG icon
-
To add an image you can write such html code here (change the src property to yours):
<img src="https://clubio.softali.net/wp/demo/wp-content/uploads/2020/06/aside-post-01.jpg" alt="test preloader" />
-
To add an image wrapped in a link you can write such html:
<a href="your link"> <img src="https://clubio.softali.net/wp/demo/wp-content/uploads/2020/06/aside-post-01.jpg" alt="test preloader" /> </a>
-