Pages
Common Pages
-
Create a page, set theme's styling
Go in the left admin menu Appearance -> Pages -> Add New
In the right part Page Attributes choose Template -> Clubio Template
Styling of a page find in the bottom part Page Format Options

-
All Page title background
Go in the left admin menu Appearance -> Customize -> Header Image
Upload a new image/remove image/choose between existing images

-
General recommendation about working with pages
- All pages are composed by using of WPBakery visual composer. You can open each element, change texts, images, backgrounds in it.
-
To edit some page go in admin: Pages.
Press on a page title or press the Edit button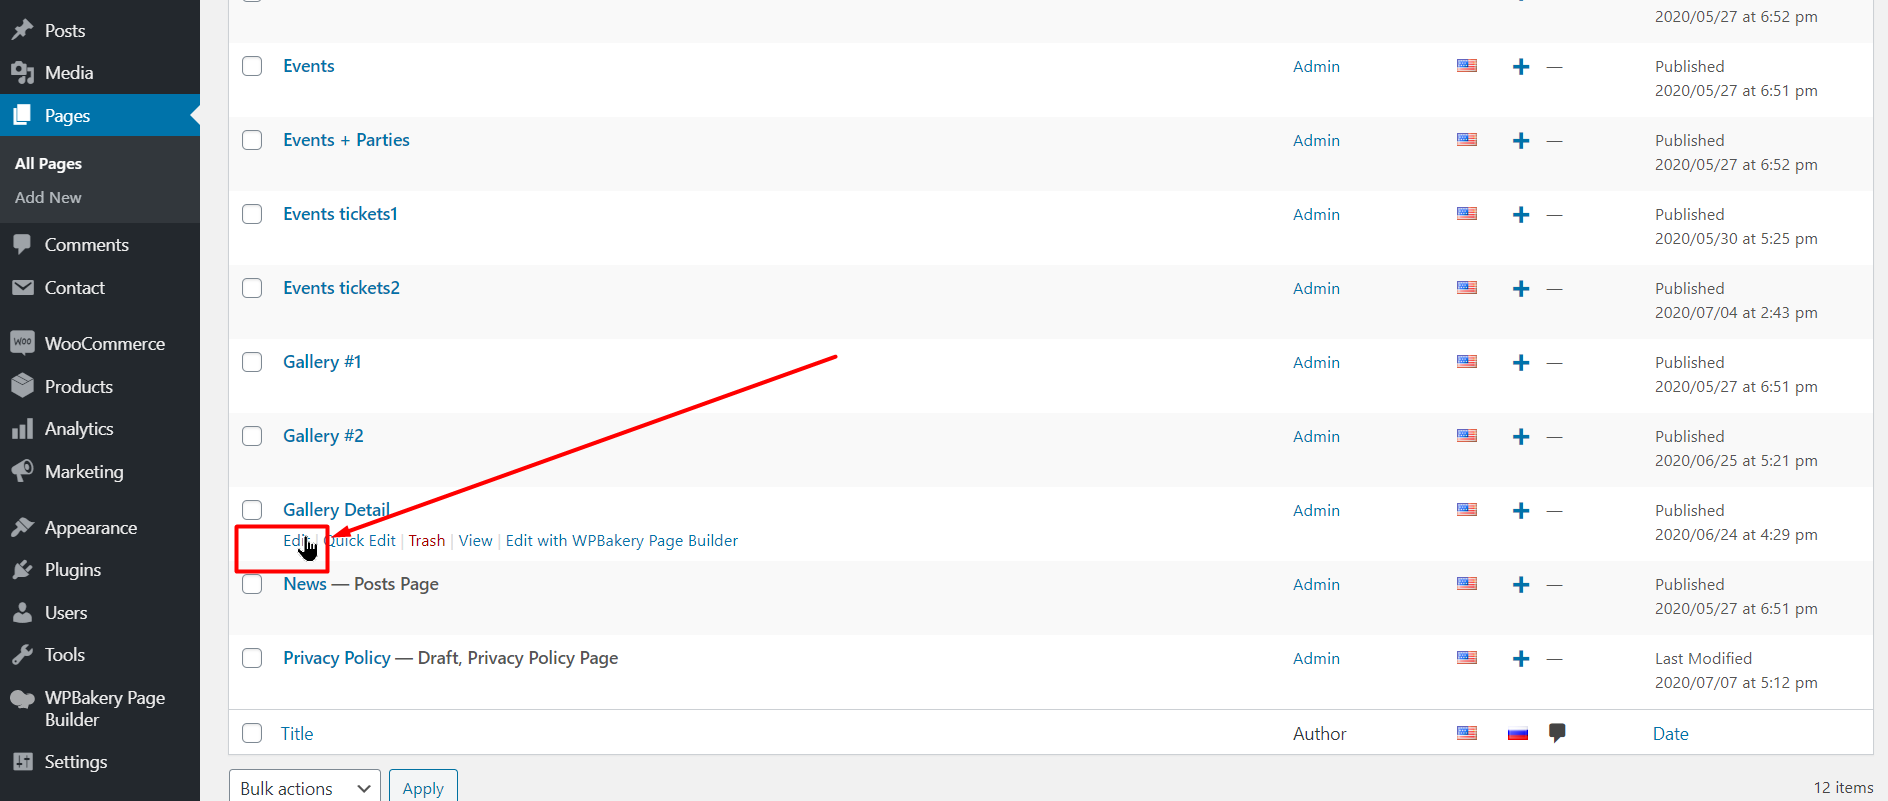
-
To work in easy visual mode with WPBakery Composer you should enable it by pressing Backend Editor button (if it wasn't enabled before).
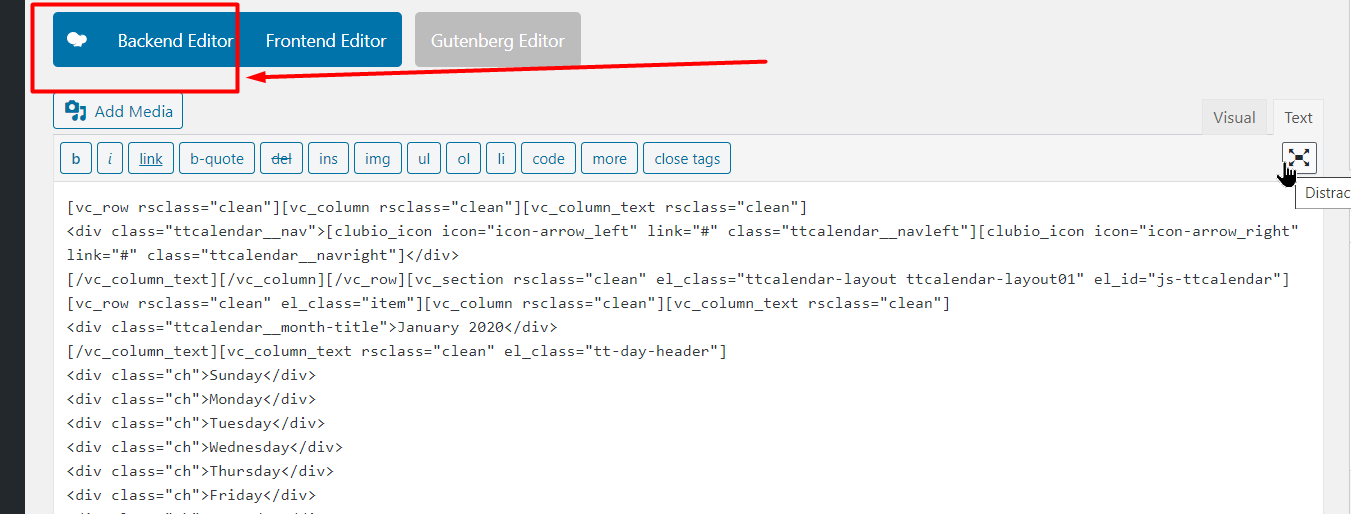
If you see Classic Mode button it means that Editor is activated
-
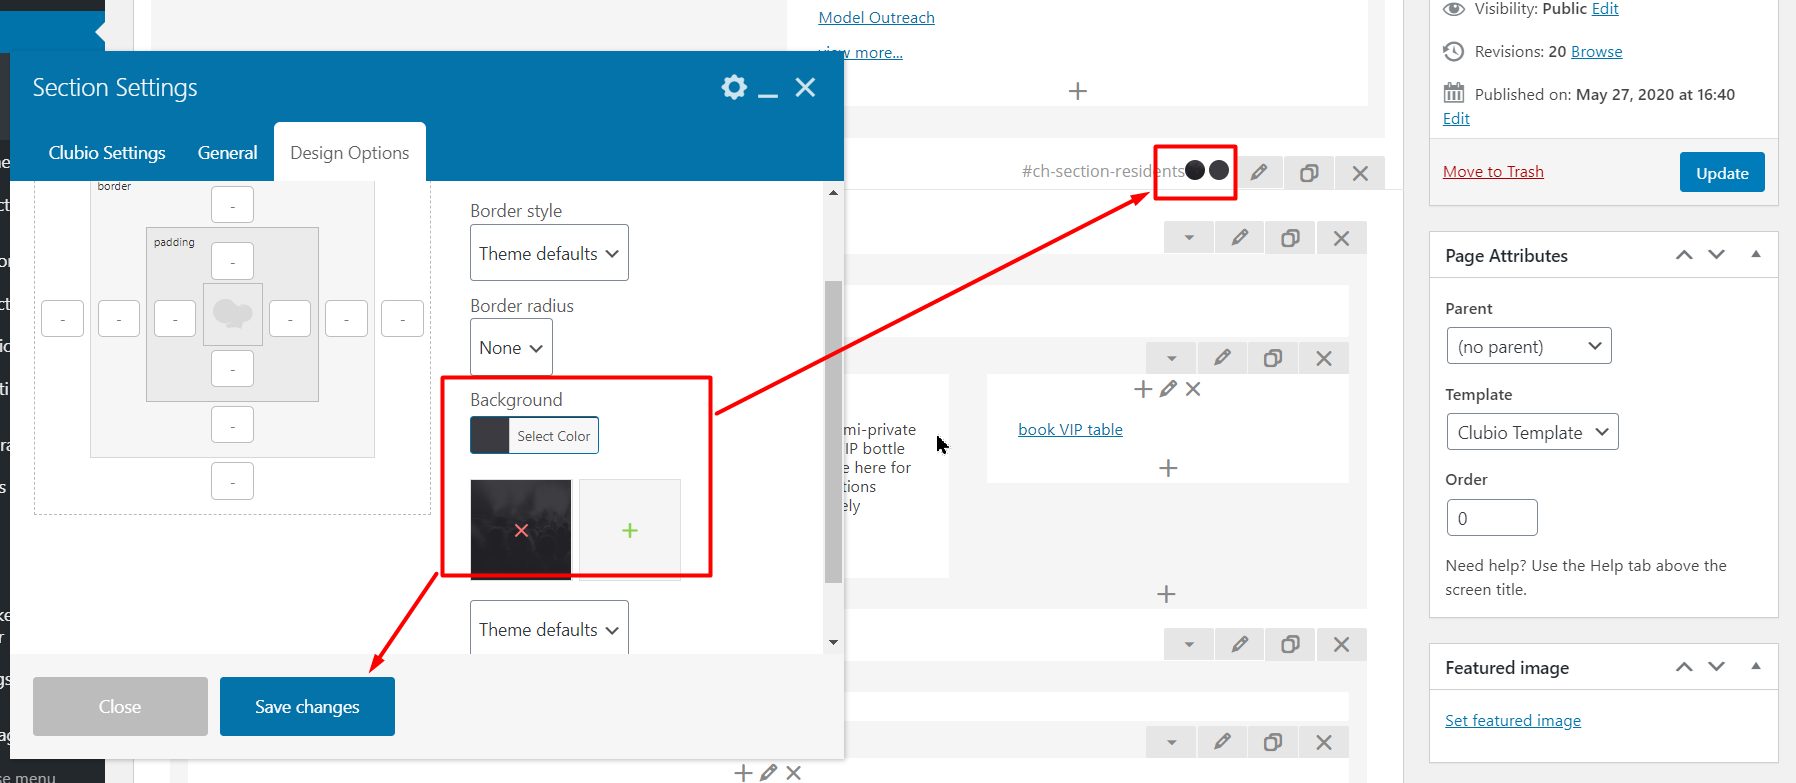
If Editor is activated you're able move blocks by their positioning
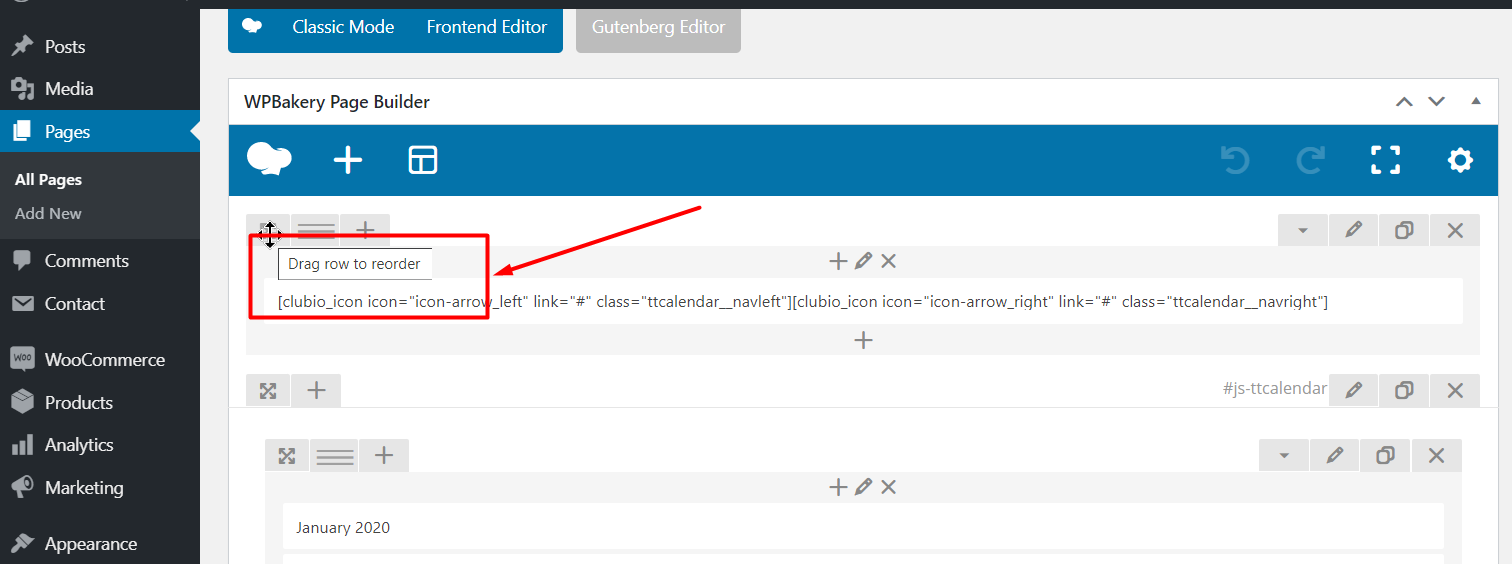
You can change texts, add own image/replace existing images Also you can change/add background image and (or) background colors of blocks
-
Our theme has own html/css structure, so, in all blocks we reset default WPBakery grids structure by filling such term in the field:
Clean Classes Box: cleanf you need to use default stucture of composer blocks just remove this term here. But this can broke the theme's structure. So, we recommend to not use this term only if you create own blocks, not in theme's pre-made blocks.
-
You can find here the original codes for all pages:
Events calendar
Please, keep in mind that adding of events is done by using the WooCommerce plugin product functinality. So, the plugin should be installed and activated.
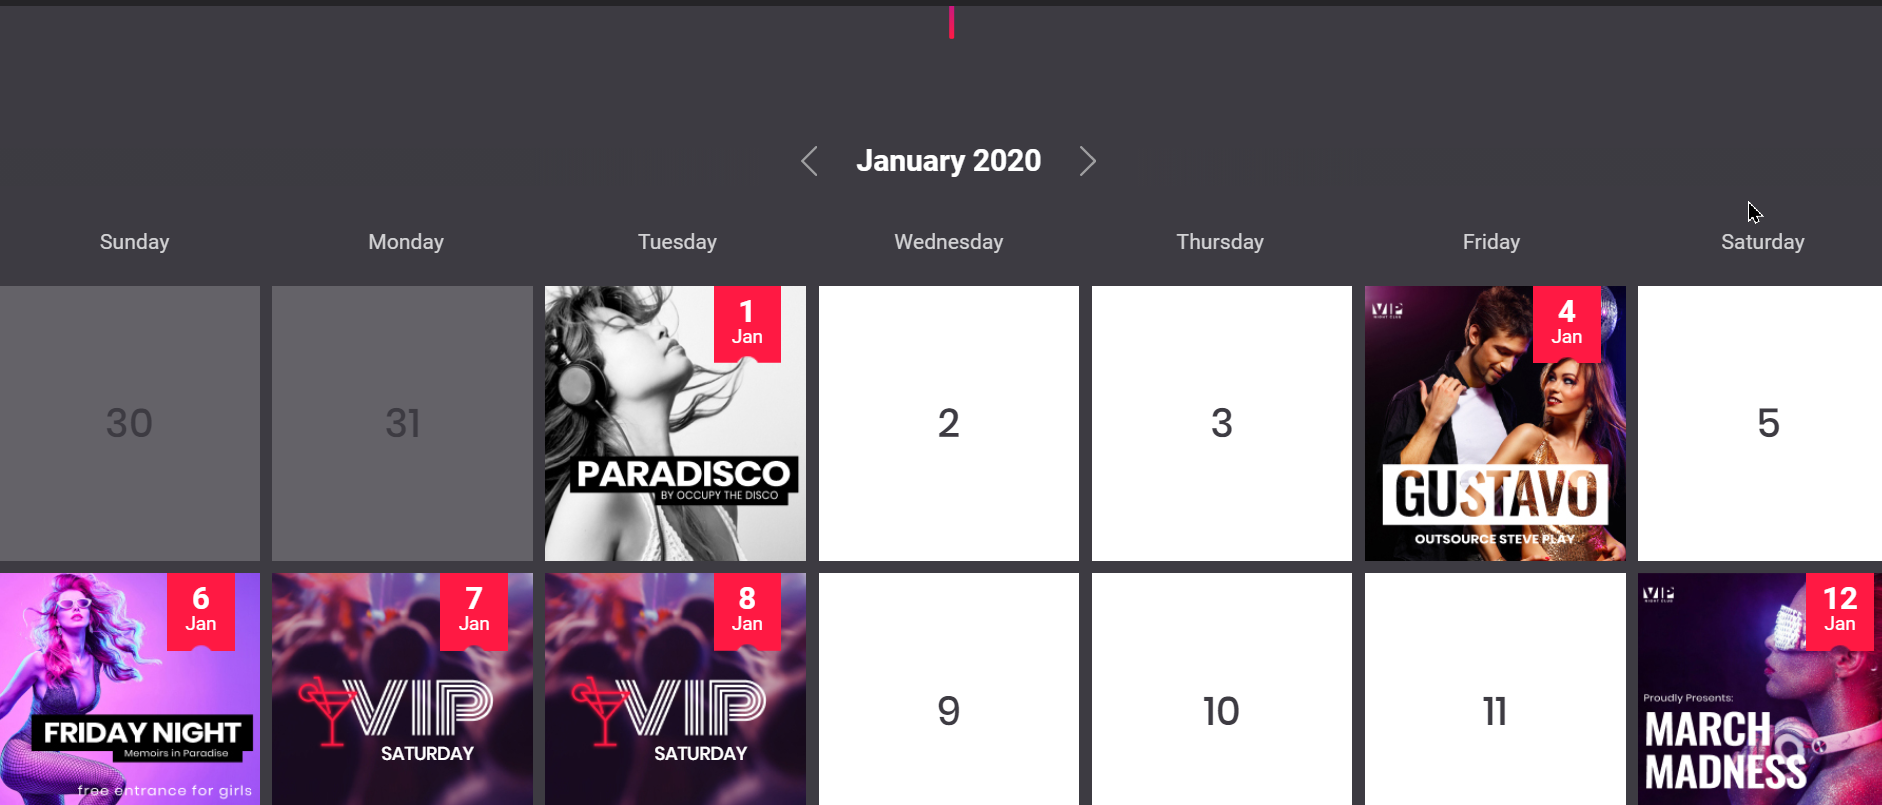
The original demo content of the premade page you can take from demo pages, item 1
-
Open in the admin Pages -> Events
-
The WPBakery composer element Tabs is used.
Please, pay attention!
To use this element for the Calendar functionality you should write in its settings: Clubio Settings -> Clean Classes Box -> clean
If you don't write this clean class you will be able to use the element as default WPBakery element.
In the field Extra class name of the opened Tab element you have to write such css: tt-day-grid
-
Each number in the calendar has own Section element under the common Tab element.
In the Section, please, pay attention for such neccessary parameters:
Clean Classes Box: calendar
-
Day type: Empty or with Event
There are two possible parameters here:
- active - Active day of a month: can have a holiday label or a product as event.
- old - a day from the previous month (will be darken). -
In each Section you can add any content or left empty.
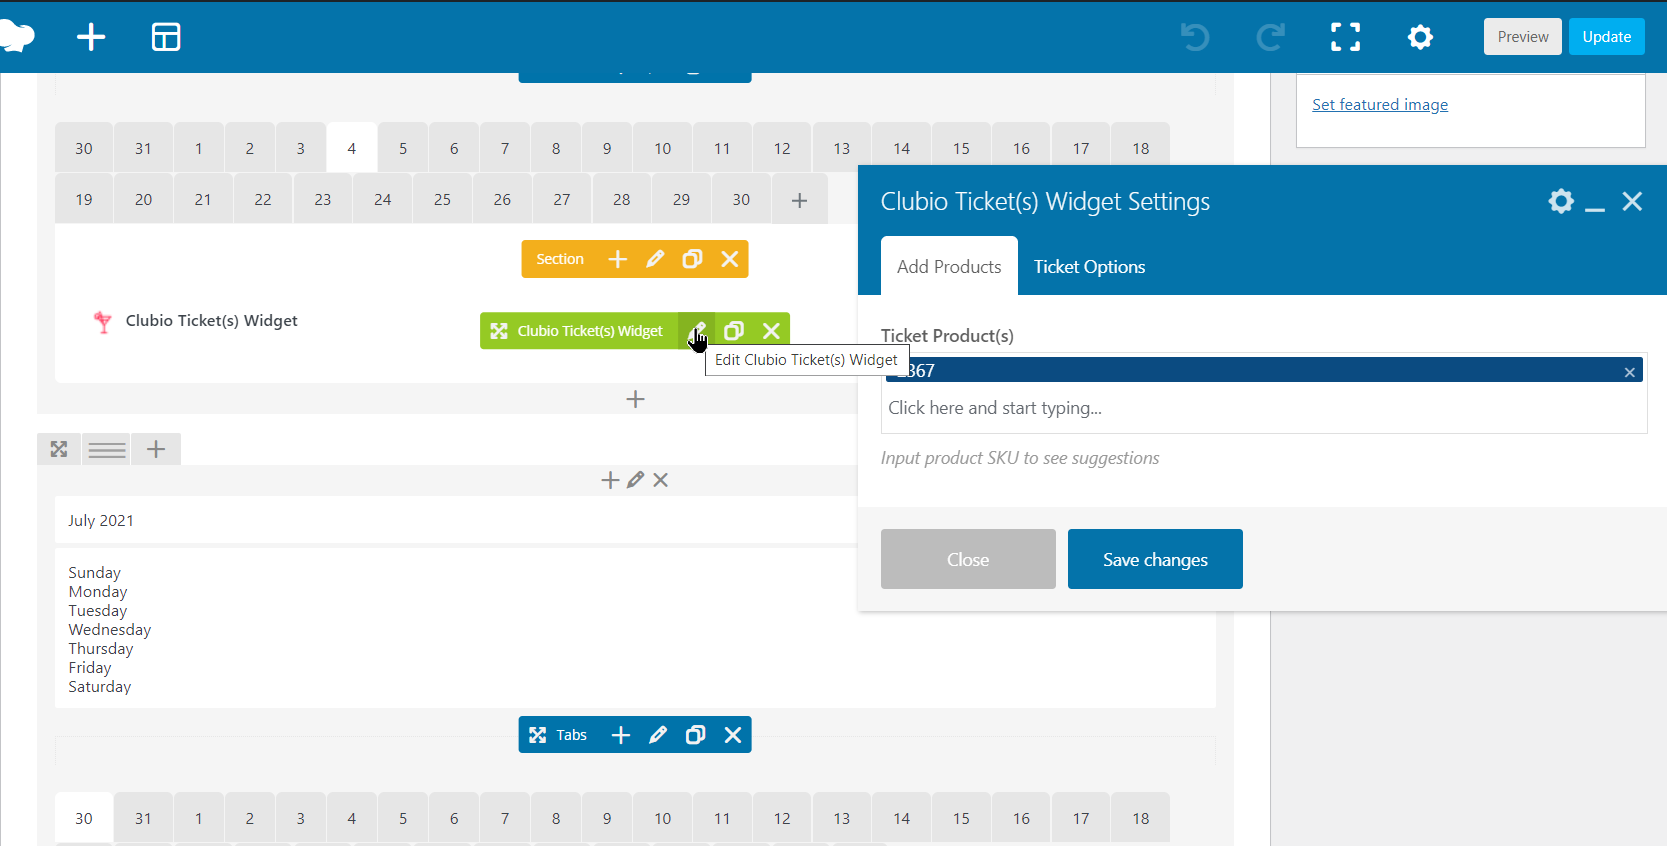
If you need to add an event on some date add the element of WPBakery composer Clubio Ticket(s) Widgets
-
IMPORTANT!
for the Calendar page choose in Clubio Ticket Settings Tickets Options -> Type of Ticket block -> Single event product in Calendar
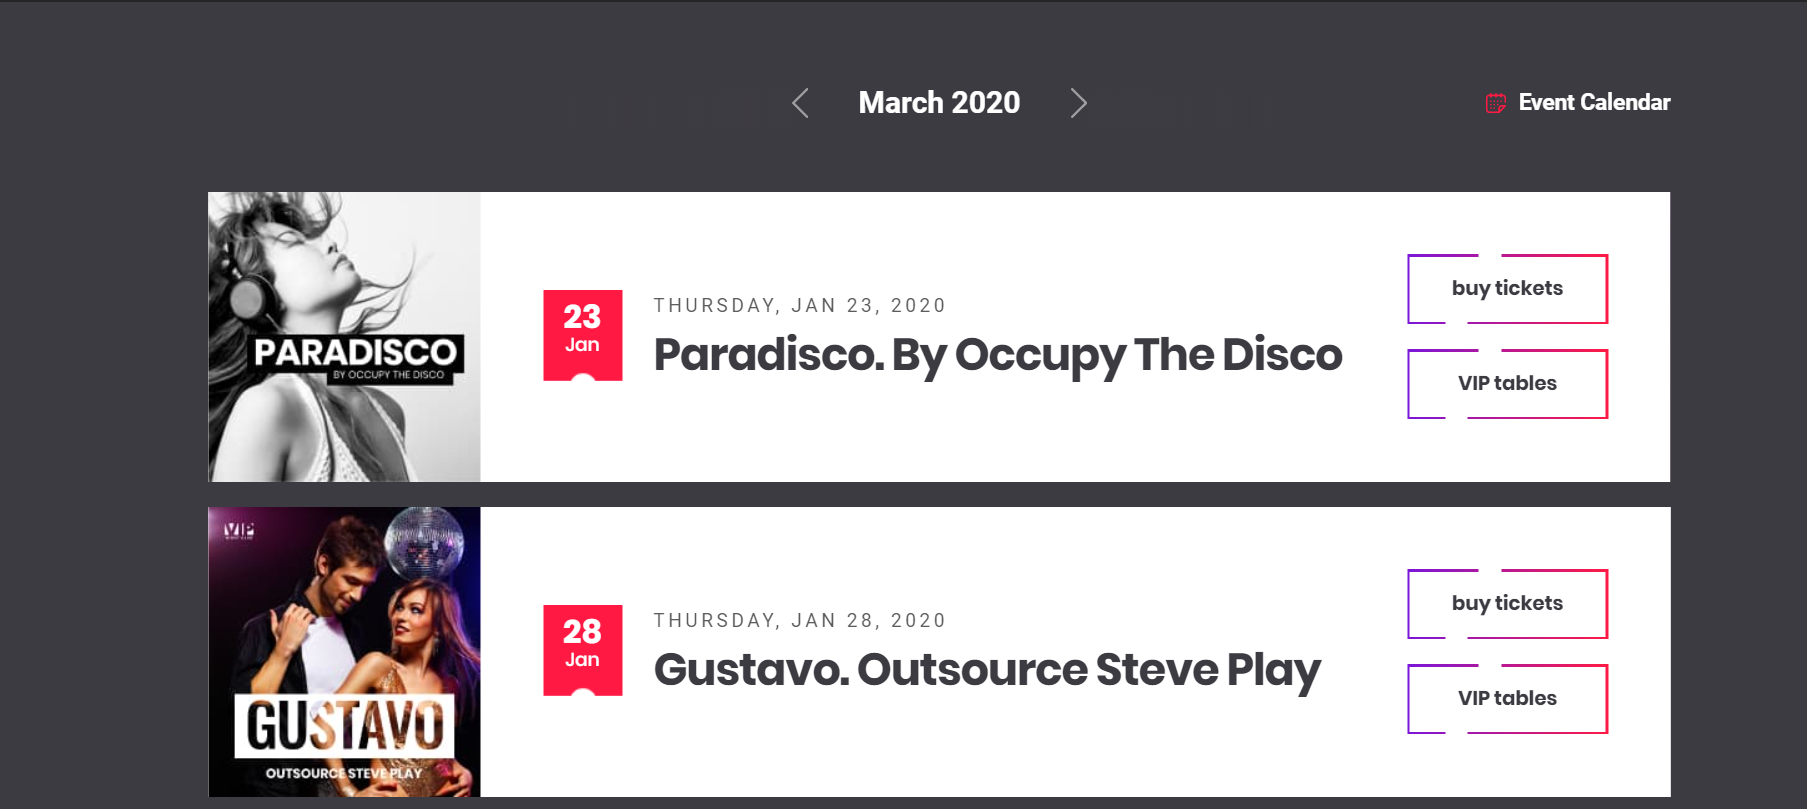
Events tickets
There are two types of events tickets page types
Events tickets 01
Please, keep in mind that adding of events is done by using the WooCommerce plugin product functinality. So, the plugin should be installed and activated.
-
IMPORTANT!
for the Events tickets 01 page choose in the Clubio Tickets Widgets Clubio Ticket Settings Tickets Options -> Type of Ticket block -> Columns
Events tickets 02
Please, keep in mind that adding of events is done by using the WooCommerce plugin product functinality. So, the plugin should be installed and activated.

-
IMPORTANT!
for the Events tickets 01 page choose in the Clubio Tickets Widgets Clubio Ticket Settings Tickets Options -> Type of Ticket block -> Rows
Tickets Product
-
To add an event as products, firstly, check if the plugin WooCommerce is installed and activated.
Add the WPBakery element Clubio Ticket(s) Widget
-
In the tab Add Products choose products by entering the SKU text of a product.
For the Calendar page - choose only one product here
For the Events page - choose as many products as you need for the carousel
-
In the tab Ticket Options pay attention to the parameter Type of Ticket block:
- Columns - all events products will be placed in columns
- Rows - all events products will be placed in rows
- Single event product in Calendar - used for the Calendar page, one product decoration
-
Use the custom html for buttons?
If the option is enabled the option Content for buttons appears.
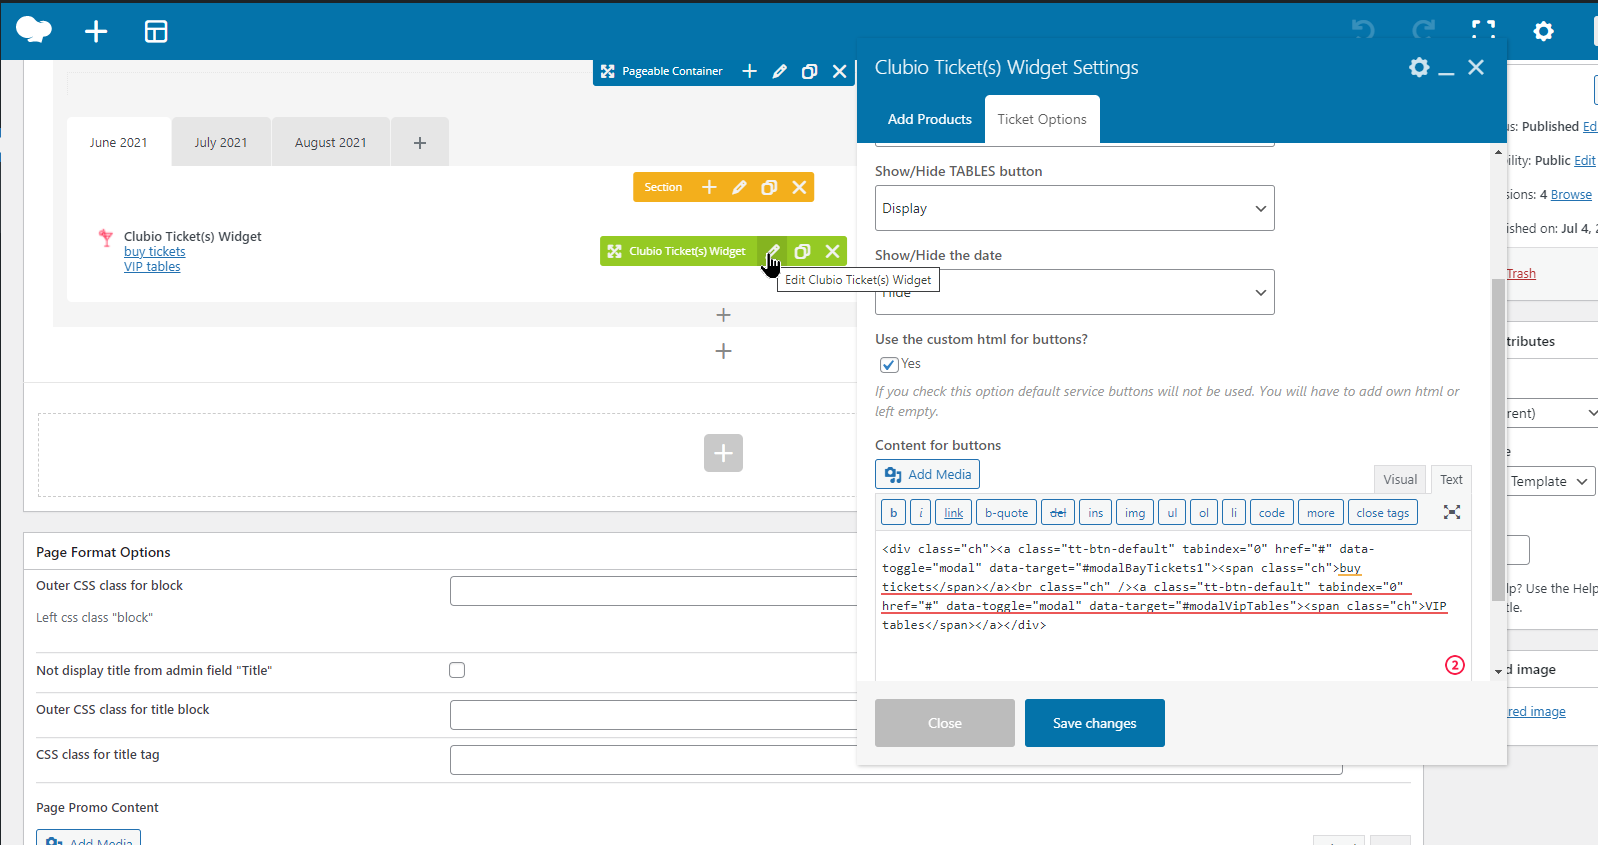
Default demo buttons html content, Type of Ticket block: Columns
Default demo buttons html content, Type of Ticket block: Rows
-
There are also the options added directly to a product
Images in the element come from product images.
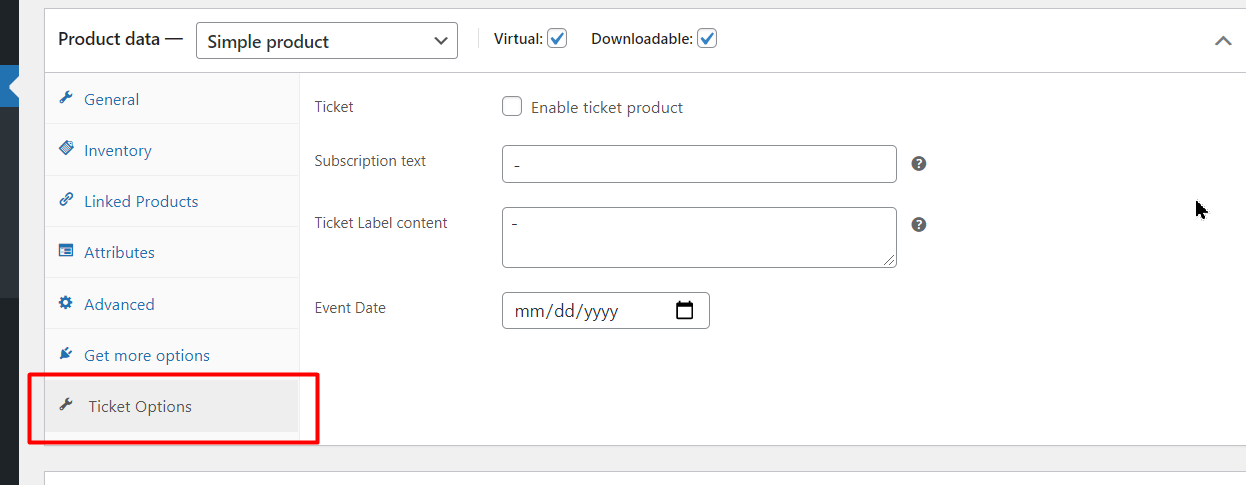
Their sizes come from Apperance -> Customize -> WooCommerce -> Product Images -> Thumbnail widthTo set them go in the admin: Products -> Product Data -> tab Ticket Options
-
Subscription text (write the symbol "-" to not see the block at all)
-
Ticket Label content (write the symbol "-" to not see the block at all)
-
Event Date
-